Sunday, September 23, 2007

Morimoto


I was really excited to receive my pre-release copy of Morimoto, published by DK, DK is one of my favourite publishers, their Eye Witness travel guides are just amazing. I was expecting beautiful pictures and I was not disappointed.
So who is Chef Morimoto and why should I get his book? Masaharu Morimoto is the regular iron chef Japanese in the Iron Chef and Iron Chef America shows. I always have fun watching these shows on the Food Network, and I was curious to see what a book by him could provide.
The book starts with a 2-3 page biography of Chef Morimoto and his career as a chef, this biography was written by JJ Goode (a long-time food writer). It is then divided in several chapters:
  • Sashimi and Sushi: Including a description of how to cut fish, clean octopus and clean clams
  • Rice, Noodles, Breads and Soups: With several recipes for rice dishes, including my beloved sticky rice in lotus leaves
  • Fish and shellfish: With recipes for lobster, crab, shrimp, etc.
  • Duck, Chicken, Pork, Beef and Lamb: This is the chapter that seems to be the most "fusion", since it includes a lot of recipes that seem French-ish, and stuff with hot fiery chiles
  • Vegetables, Tofu and Eggs: A chapter that I was especially interested in, because of its vegetarian content. It includes a recipe for tempura vegetables. Sadly, a lot of veggie and tofu recipes include some type of meat, or cheese
  • A special chapter called Recipes to Contemplate: Which includes an abalone croquette. Curiously, there is a typo on the title and it says "albalone" (page 211).
  • Desserts: There is a tofu cheesecake that looks delicious (my readers will have to try it for me and let me know what they think, since I cannot eat any cheese)
  • Stocks, Oils, Spices and Sauces: Recipes for different sauces and stocks that are needed for the various recipes in the book

There is not a lot about specific garlic content, there is a Grilled Steak with Garlic-Soy Jus that looks delicious, the garlic-soy jus includes 6 garlic cloves!, fresh ginger, sugar, veal reduction (recipe included in the book), soy sauce, mirin (fortified wine made from glutionous rice and used solely for cooking, according to the glossary), sesame oil and onion. The truth is that it looks delicious! There is a lamb carpaccio that includes "shiso buds" or garlic flowers as garnish, this is such an original way of garnishing that I'm looking forward to trying it. Garlic is included in some other recipes, but not very prominently. It doesn't matter, the recipes are so delicious this is a book worth having. The thing that I liked the most is that it has a kind of "guide" in each chapter describing how to use the ingredients, like how to cook the rice, what dashi is, how tofu is made, etc. All the explanations and most of the recipes are accompanied by step-by-step photos illustrating the process.

This is definitely a book worth getting for reference and as a cook book. The only "but" for me is the same as always, the price is $40 USD but it is $50 CAD. At today's conversion rate it should be about $42 CAD. A 25% markup is too much for us Canadians. I recommend ordering from an American bookstore, like Barnes & Noble, they give you a discount and even with the shipping it's well worth it. (Sorry Canadian retailers, it's not my fault, it's just common sense).
The amazing photography is by Quentin Bacon.

Tuesday, August 7, 2007

Biga Bread with Garlic

Pacific College Mom sent us another delicious recipe:
This is an adaptation of a one originally appearing in Sunset magazine. It is my absolute favorite bread, chewy and hearty. It takes a little longer to make, but it’s definitely worth the effort!
¾ teaspoon active dry yeast
1 Cup cool tap water
1 teasp sugar or honey
¼ Cup Biga (recipe follows)
2 Tblsp milk
1 Tblsp finely chopped garlic (or rosemary)
¾ teasp regular salt (optional, I omit it)
3 – 3 1/4 Cups flour
½ teasp coarse salt

In a large bowl, sprinkle yeast over water and sugar or honey, let yeast dissolve. Add biga, milk, garlic, regular salt, and 2 Cups of flour. Mix well, and then knead in ¾ Cup more flour to create slightly sticky dough. Place dough in an oiled bowl, cover and let rise in a warm place for 1 ¼ to 1 ½ hours until doubled.

Punch down dough and knead briefly. On a floured board, shape dough into a smooth ball. Place on a well floured baking sheet. Cover with plastic and let rise again about an hour, or until springy when lightly touched.

At least 30 minutes before baking, place baking stone or a large baking sheet in the oven and heat oven to 400 degrees. With a sharp knife or razor slash top of dough, sprinkle cut with coarse salt. Mist the dough and walls of oven with spray bottle filled with water. Slide dough onto hot stone or baking pan, bake for about 35 minutes, or until bread is deep golden brown. Cool on rack.

Biga
¼ teasp yeast
½ Cup cool water
1 Cup flour

Sprinkle yeast over water, let dissolve. Add flour, mix well. Cover and chill 24 hours before using. Can be stored in the fridge up to 2 weeks. Makes 1 cup.

Friday, June 29, 2007

Chicken with Double Garlic Black Bean Sauce

Pacific College Mom sent us this delicious recipe. It looks so delicious, I think I'm going to make it this weekend. After all, I'm going to St. Lawrence Market tomorrow to stock up for the long weekend.
Happy Canada Day, everyone!


1 Tablespoon Aji-Mirin (sweet rice wine)
4 Teaspoons low-sodium soy sauce, divided
5 Teaspoons cornstarch, divided
1 Teaspoon sesame oil
2 large chicken breast halves, cut into bite-sized pieces
1 Tablespoon Garlic Black Bean sauce
1 Teaspoon minced fresh ginger
1 Clove minced garlic
½ Cup chicken broth
1 Tablespoon oyster sauce
3 Tablespoons olive oil, divided
1 Pound fresh asparagus spears, cut into 1-inch pieces
1 Stalk celery, sliced into 1-inch pieces
1 small onion, diced
3 Tablespoons water (I use water from the pasta)
4 servings (large handful) angel hair pasta


A.) Make a marinade of wine, 2 teaspoons soy sauce, 2 teaspoons cornstarch and the sesame oil. Add chicken pieces and toss well to coat. Chill for 30 minutes while preparing the veggies.

B.) Mix together black bean sauce with ginger, minced garlic, broth, 2 teaspoons soy sauce, oyster sauce, and remaining 3 teaspoons cornstarch, set aside.

C.) Prepare pasta in salted water, if desired.

D.) Heat 2 tablespoons oil in a wok or large skillet over high heat. Add chicken with marinade and stir-fry for 3 minutes, or until the chicken is opaque, about 3 minutes. Remove from pan.

E.) Heat 1 tablespoon oil to wok and stir-fry veggies for about 2 minutes. Add 3 tablespoons water to the pan, cover, and cook for another minute.

F.) Return chicken to the wok, add sauce mixture, and cook until sauce thickens. Serve over the pasta.


And for our American readers, Happy Fourth of July too!

Monday, May 21, 2007

Roasted garlic and parsley potatoes

Now that spring is here, the Farmers' Market on the North side of St. Lawrence Market is filling up with better and better delicious goodness. On Saturday I went and bought a lot of veggies. Among the things I bought were potatoes and garlic.
Since I was going to grill some other veggies, I decided to make my special roasted potatoes with garlic and parsley.

Ingredients:
One pint baby potatoes, halved
3 teaspoons olive oil
6 cloves of garlic, sliced
Sea salt
Parsley flakes

Prepare a "pocket" with foil and place the halved baby potatoes and the slivered/sliced garlic.
Spread it with the olive oil, sea salt and dehydrated parsley flakes.

Fold the "pocket" and bring it to the barbecue. Grill on high heat for about 20 minutes.
It's that easy. The potatoes were crunchy and garlicky and oily and delicious!

And remember dear Garlicster readers, eating local, is healthier and uses less fuel. Help your local farmers, it is always good to know the person who is growing your food.

Tuesday, May 15, 2007

I've been so busy

I've been super busy lately and haven't had much time to post. Don't worry my dear Garlicster readers, I have not abandoned the blog.
So, I recently received Educating Peter by Lettie Teague. I like the subtitle in this book "How I taught a Famous Movie Critic the Difference Between Cabernet and Merlot or How Anybody Can Become an (Almost) Instant Wine Expert".
I am excited about starting to read this book, because I am also a bit of a neophyte with respect to wine. OK, I'm not that bad, at least I know that there is red wine, white wine, rosé wine and sparkly wine. Oh, and let's not forget Portuguese green wine. I want to go for a Niagara winery tour soon, just for fun, but it wouldn't hurt to know what is going on.
So it may not have much to do with garlic, but it is quite interesting. I'll look up for garlic pairings, maybe we'll get some information on what wine to drink with delicious garlic, mmmh.
The book is published by Simon & Schuster and is $25 USD. The publication date was March 13, 2007 so it's quite recent.
So I'm going to start reading it and I'll give an update to my readers as soon as have some comments to make. Maybe I'll become an (almost) wine expert soon!

Wednesday, April 18, 2007

Kheema, by Vijay

Published at Lorence's Kitchen
Ingredients:
½" peeled & finely chopped fresh ginger
6 cloves of garlic, minced (6 of 'em! oh yeah!)
2 large onions, finely chopped
2 pounds of ground meat (lamb or a decent beef, like sirloin)
2 medium tomatoes, chopped
1 teaspoon of salt
2 Tablespoons of garam masala (if you can't find it locally, order it from Penzey's)
1 teaspoon of ground cumin
A few mustard seeds (I usually use about ½ teaspoon or so...)
2 tablespoons of vegetable oil

Optional veggies (that I don't think are optional at all)
1 cup of cut green beans
1 can of pigeon peas (gandules), drained. (I think it's about a 14.5 ounces can)
Cubed potatoes, ½"cubes (I use 3 regular sized russets, about 2 cups or so)

I usually don't have fresh ginger on hand, but I always have a tube of ginger paste in the fridge. Fortunately for me, my local grocery store carries it, so look around! It's probably hiding out there somewhere. Also useful for this dish is a small can of whole tomatoes (in tomato juice) instead of fresh - I keep a couple of cans in the cupboard at all times for just such an emergency... chop up the entire can and add the juice, too.

The directions:

Add the oil to a large (did I say large? I meant LARGE) skillet and sauté the onion until soft and transparent.
Add the ginger and garlic and sauté for another minute or so.
Add the ground meat and brown it for 10 minutes. Break it up so it is in fine pieces.
Add the spices, tomatoes, and "optional" veggies, stir it all around...Cook, covered, on low heat for about 40 minutes

The finished product:


I serve this with basmati rice that I flavor with a bit of cumin, cilantro and some whole garlic cloves. The cloves boil and steam to a tender softness that allows them to be spread on some bread...


Enjoy, and think good things for Vijay.
Lorence

Thursday, April 5, 2007

Peanr and apple and spinach saute with garlic

This recipe works out wonderfully for a vegetarian diet, to make it vegan, substitute the butter for margarine.
IngredientsIngredients:
Two apples,
two pears,
one head of garlic,
one packet of dry roasted peanuts,
the juice of one lemon,
one tablespoon of butter,
two packages of spinach.


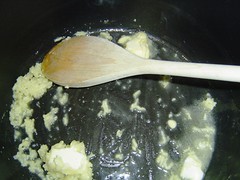
Melt the butter and add the pressed garlic until lightly browned.
Garlic and butter

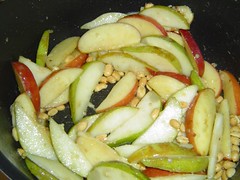
Add the chopped apples and saute until tender, then add the chopped pears and the peanuts and keep sauteing. Be careful because pears are softer than apples and you don't want them to get to be mushy.
Fruit

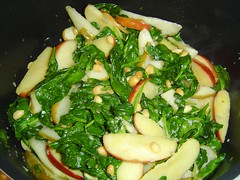
Add the spinach and saute until wilted.
Spinach
Finally sprinkle the juice of half a lemon.

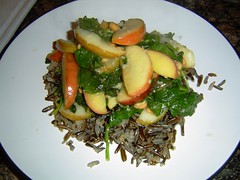
Serve over cooked wild rice.
Serve over wild rice
This is a lot like the "bowls" from Fresh on Bloor and on Spadina, but with the advantage that it is homemade. Very nutritious and delicious.

Wednesday, March 28, 2007

Green garlic

Sorry about the lack of updating, I've been swamped.

Michael sent the following email:
The other night I made some garlic bread. Instead of using butter, I decided to drizzle olive oil on the baguette. I then crushed a few cloves of garlic and spread on the bread and then added a little bit of salt. I placed the bread in the toaster oven and twenty minutes later when I went to take a look at the garlic bread, I was shocked. The garlic turned green! This has never happened in all my years of cooking. The cloves looked good when I crushed it so I can't understand what could have happened. Have you ever heard of anything like this?

I'm pretty sure it was the olive oil that turned the garlic green. I have seen it turn onion green so yeah. I think that's what happened.

Any other opinions about the issue?

Friday, March 9, 2007

Garlic trivia

A while ago (almost two years ago now, wow!), I asked how everyone keeps their garlic. I had an incident in which my garlic sprouted in my kitchen. A lot of people responded to my questions:

Roger said:
garlic should be stored in a paper bag.

eLisa wrote:
Well I don't really know about garlic in specific, but I do know about onions. You keep onions in a brown paper bag in the low humidity side of your crisper and they stay firm and do not sprout for a really long time. I use my onions within a month, so I don't know how much longer than that that they would keep. Perhaps garlic is similar? I just buy new garlic whenever mine gets soft or sprouts and never thought about trying to keep it in the frig cause I heard it was a no-no like you did. I am going to try the brown paper bag thing now that you've got me thinking about it!

Arthur:
If your garlic sprouted that quickly, then it was ready to sprout. I worked in the Caribbean and bought garlic by the case. Sometimes it would all sprout in a couple of weeks, other times I could keep it for months. The only advice that I can give you is to buy high quality bulbs, keep them cool and in the dark, and don't use any sprouts. I'm sure that a garlic farmer could give you much better advice.

Patrick sent this email:
I have tried various ways of keeping garlic and I still feel the best way is to store it in the fridge where it stays dark and cool. I keep it in one of the veg. draws with my onions(which I keep in a plastic bag) and this seems to keep the garlic fresh and it lasts the longest. Like you I have kept my garlic stored in the dark , but in a a cabinet and it too, started to blossum. I think the cool temp. is what helps keep it fresh the longest. Hope we hear about other ideas!

Fritz said:
I have seen small ceramic crocks that were sold as storage for garlic, claiming to keep it fresh longer. When I buy garlic it is alot like buying bananas. The state that the garlic is in at the time of purchase will tell me alot about how long it has till it is compromised. I try to find it in the best posssible state and then use it up as soon as possible.

Annie left this comment:
I keep fresh garlic flavorful by peeling the buds clean, then packing the cloves tightly in a small jar, then cover with olive oil...they stay firm. I keep them in the fridge, although have been meaning to try storing it in the pantry to see just how long it will keep.

Simple suggested:
I keep my garlic in a ceramic crock on the kitchen counter so it's always nearby. I can purchase 4-5 head and still come to the end of 3 weeks without it being compromised. Garlic needs to be in a dry, dark environment for best storage, but you should carefully choose only the best at the store to prolong your garlic's "shelf life."

Eric also said:
Not unlike the other garlic aficionados, we keep our garlic in a little ceramic crock with dime-sized holes all over its circumference. Whenever we maked chili, spaghetti or any other dish that we feel could use some, it's right there.

Last week, Dan raised the question again:
As my wife and I were cooking Saturday night, I mentioned that I didn't think it was necessary to put garlic in the refrigerator. She thought I was probably right, but that she'd always kept it there "just because". I thought you might have some insight either way.
BTW - I'm glad you don't think Brian is old at 45. I'll be 43 in a couple of weeks, and I'm starting to feel the mileage on the odometer.


After my consultations, I think the most popular method is to keep the garlic in a sort of "cookie jar" ceramic container, screw the cap tightly and not let any light see the garlic.
I still keep it in the fridge, but I have to say that it softens a bit, I'm pretty sure that is not how it is supposed to be.

Does anyone have any more suggestions?

Monday, February 26, 2007

Garlic and tomato paste

Brian writes:
"I eat two cloves of Garlic a day and one can of Tomatoe Paste every day and feel fantstic at 45 years old! Brian"
Sounds like good advice. Garlic is delicious and I looooooove tomatoes. Love them, love them, love them. Then again, Brian, you're not that old at 45!

Tuesday, February 6, 2007

Garlic for Valentine's Day

It is romantic, and it has garlic. Make sure that both you and your partner eat lots of it. Both romantic and smelly!
Recipe shamelessly stolen from Suite 101

Baked Oysters With Garlic

12 fresh oysters, shucked and rinsed well
3 tablespoons butter + 1 teaspoon for greasing casserole dish
1 clove garlic, minced
1/2 cup dry unseasoned breadcrumbs
1-2 tablespoons freshly grated parmesan cheese
2 teaspoons chopped fresh parsley
salt and pepper to taste

Preheat oven to 400 degrees Fahrenheit.
Butter a small casserole dish, or for individual servings use ramekin dishes. Set aside.
In a small skillet, melt the butter. Add garlic and breadcrumbs and saute over medium heat until mixture is golden and slightly crumbly. Remove from heat and stir in the parsley. Spoon mixture over oysters and sprinkle with parmesan.
Bake oysters in the preheated oven until bubbly and lightly browned - about 15 minutes. Serve warm.
Makes 2 servings, 6 oysters each.

Friday, January 26, 2007

Puttanesca Sauce

I received the following email from Javier:

I have tasted a Puttanesca spaghetti at a restaurant that has become my favorite. The sauce has a very strong garlic flavor in it.
I have prepared different dishes with "AMORE" garlic paste, and like it a lot, I consider that it imparts a different garlic flavor to foods than minced garlic, and both complement each other very well.
But returning to that puttanesca sauce, this time I purchased one litter of the product, which was given to me still hot. When I opened the container, I could find one chunck of tomato that tasted very strongly to garlic. I'm sure it's some kind of garlic marinating that is done to the tomatoes, perhaps for several weeks before preparing the sauce. It was the tomatoes that had the strong garlic flavor which I'm looking for, and not the rest of the liquids in the sauce.
Perhaps you have an idea as to how to marinate the tomatoes.
Javier


I know that if you fry garlic in olive oil, being really careful not to burn them, you get garlic flavoured olive oil that is great to use as seafood salad dressing. I wonder if maybe sauteeing the tomatoes in olive oil and lots of garlic would make a difference.
Does anyone have any suggestions??

Monday, January 15, 2007

Green beans with garlic and green onions

Ingredients:

1.5 cups of green beans cooked,
3 bunches of green onions
3 cloves of garlic
3/4 cup vegetable buillon (I used Knorr)


Chop the green onions and garlic, place them in a pot and pour the vegetable buillon over them. Boil for about 5 minutes. Incorporate the cooked green beans and boil until almost all of the liquid had been reduced.


Serve with rice.

Thursday, January 11, 2007

Creamy White Bean Soup with Kale, Garlic and Sausage

This recipe was sent by Lorence, I shamefully stole all his pictures. You can see the original on this link. Also he's got lots of recipes on his website, be sure not to miss it!


This is another of our cool weather favourites. The textures, aromas and tastes in this dish all combine to create a refreshing melange that's warming and incredibly flavourful. And it was a great way to use kale, which around here, is usually inexpensive and plentiful. I saw this recipe in Redbook Magazine's February 2000 issue. I didn't really notice the recipe at first & it wasn't really the kind of recipe I would normally have paid much attention to, but the photo...Oh the photo looked delicious. I saw that picture and I wanted a bowl of whatever it was! A few weeks later, I made the recipe and we've been hooked since. I wish I still had the original magazine so I could post that photo, but all I have left is a photocopy. I'll try to take a shot next time I make it (probably in a couple of weeks).

The remarkable thing with this recipe is that I don't change a thing (Well, ok, sometimes I use a bit more smoked sausage...). The recipe calls for 3 cloves of garlic. Finally! Why, oh, why would a recipe call for only 1 clove of garlic?!? What good is that? I love garlic, so I use a lot of it, and this recipe calls it right - 3 cloves. 3 LARGE cloves. Yum.

Creamy White Bean Soup with Kale, Garlic and Sausage
Ingredients;
8 ounces of Kielbasa, thinly sliced
1 Tablespoon of olive oil
3 cloves of garlic, minced
2 19 ounce cans of Cannelini beans, rinsed & drained
(great northern work, too, if that's all you can find)
2 14.5 ounce cans of chicken broth
4 cups of chopped kale


Directions:
1. Brown the sausage in a large saucepan over medium-high heat. I brown it until the bottom of the pan starts to turn brown with the cooked fat.

2. Remove the sausage from the pan to a bowl.
3. Add the oil to the pan and add the garlic. Cook the garlic for about 30 seconds. Don't let it brown! (it will turn bitter if it browns!)

4. Add some broth to the pan to deglaze it, scraping up as much of the browned bottom of the pan as possible, adding more broth as needed. Then add the rest of the broth.

5. Bring the broth to a boil.
6. Add the beans & reduce the heat to bring the beans and broth to a simmer.


7. Simmer for about 5 minutes.
8. Remove 1 cup of soup, including some beans, to a blender and puree the mixture until smooth.


9. Stir the puree back into the soup.


10. Add the sausage back into the soup.
11. Add the kale to the soup and simmer util the kale is just tender, then serve.

This makes 6 1/2 cups, and goes great with a nice crusty bread.

Enjoy,
Lorence

Thursday, January 4, 2007

Chicken Breasts with Tomato Butter

This recipe was posted on Lorence's Kitchen (link to the recipe). Take a look at his blog, he has some delicious recipes, not all featuring garlic but they are just so good!

(The picture was also shamefully stolen from his blog)
I knew I was going to have to make something quick last night since we were heading to my son's school Christmas show, so I dug this recipe out a couple of nights ago for the small bit of night-before prep it requires. That prep is simply making a sweetly pungent tomato butter that tops a simple sauteed chicken breast. The dish itself was a fast cook, since all that's done is just pan sauteeing the chicken until done. The seasoned flour on the chicken makes for a nice thin yet crispy crust. The R.O.I. on that little prep was huge!
Chicken Breasts with Tomato Butter

The Ingredients
4 Table spoons of butter at room temperature
1/4 teaspoon of finely minced garlic1 teaspoon of tomato paste1 teaspoon of chopped fresh parsley
1/4 cup of flourSalt and pepper
4 boneless, skinless thicken breasts(try not to get the monstrously large., hormone laden type - they're too thick to be pan sautéed.
2 Tablespoons of olive oil

The Directions:
Combine 3 Tablespoons of the butter with the garlic, tomato paste and parsley.
Scrape the mixture onto a piece of plastic wrap and use the wrap to help form the butter into a cylinder. Wrap the cylinder tightly and chill.
Combine flour, ½ tsp. salt and 1/4 tsp. pepper.Dredge the chicken in the flour mixture.
In a large frying pan, melt remaining 1 Tablespoon of butter in the olive oil over medium-high heat.Add the chicken and reduce the heat to medium.
Cook, turning once, until chicken is just done, about 10 minutes.Serve immediately, topping the hot chicken with slices of the butter.

Some variations to explore:
For the butter:
Use Shallots instead of garlic
Use sun-dried tomoato instead of tomato paste
Add chopped black olives to the butter
Substitute fresh basil for the parsley

For the chicken: (don't do too much here...the chicken should be kept simple)
Add some cayenne tot he dredging flour for a bit of extra kick
Try Penzey's Shallot Salt in the dredging flour instead of your usual salt

This recipe came from "First for Women" magazine, sometime in the early-mid1990's. I have several recipes from this magazine but I can't find a single one online. I'll post a few more as I make them.
Enjoy!

Lorence

Friday, December 29, 2006

Hungarian Chicken Paprikash with Pierogi

Christine says:
You have to try this recipe. It is absolutely delicious!

4 lbs boneless skinless chicken breasts cut in bite sized pieces
2 Tablespoons of extra virgin olive oil
2 medium onions diced fine
2 Tablespoons garlic minced
1/4 cup sweet hungarian paprika
2 bay leaves
salt and pepper to taste
1 - 12oz can of chicken stock
1 16 oz container of sour cream
3 Tablespoons of flour mixed with 1/4 cup of ice cold water to make paste


Saute minced onions in evoo until golden (do not burn) , add chicken breasts and brown. Add all seasonings and chicken stock except sour cream and flour mixture. Cover and simmer for 1 hour on low heat. Add sour cream, bring back to boil. Wisk flour mixture until smooth and add to pan, continue to wisk until mixture is completely mixed and will thicken. Immediately remove from heat and put in serving bowl.

Make frozen pierogi(I baked mine in the oven with a little of butter).

Put chicken mixture over pierogi and enjoy!

Monday, December 18, 2006

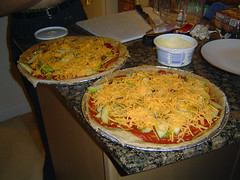
Apple-garlic pizza

We prepared this pizza on the weekend:
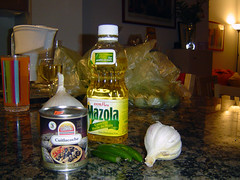
The ingredients are (sorry I don't have specific quantities, we just improvised the amounts):
Granny Smith apples
One bulb of garlic
Margarine
Tomato paste
Grated cheddar cheese
Dried rosemary
Pizza dough (homemade or Pillsbury)

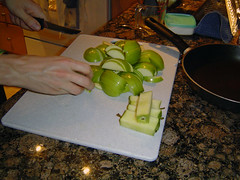
Chop the apples
chop apple
Chop the garlic
chop garlic
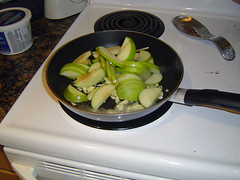
Fry the garlic and the apple in margarine
fry
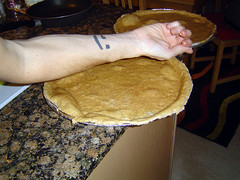
Have the pizza dough ready. We used homemade, but I don't know how it was made, you can also use Pillsbury, it's really good (you can also show your tattoo while doing that, hee hee).
pizza crust
Spread the tomato paste on the pizza dough, arrange the apple+garlic mixture and add some shredded cheddar cheese. Sprinkle with chopped walnuts and rosemary.
cheese
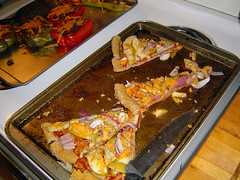
Bake until the cheese is melted. Enjoy this delicious pizza.
apple garlic pizza

Friday, December 15, 2006

Roasted Creamy Alfredo Sauce

FC OZ sent the following recipe:

3 whole bulbs of garlic
1/2 lb. cooked boneless chicken breast, cut into 1/2” dice
3/4 cup of corn kernels
1 can ( 4 oz.) chopped green chilis (for more heat, use chopped canned jalapenos!)
1 green bell pepper, seeded, and cut into 1/2” dice
1 red bell pepper, seeded and cut into 1/2” dice
2 cups of diced corn tortillas(1/2” dice)
1/2 cup shredded reduced fat Mexican four cheese(available in local markets)
1 jar (16.4 oz.) Creamy Alfredo Sauce

Remove the outer layers of the garlic bulbs and cut off the stems. Brush with oil, wrap in tin foil, and bake in a preheated oven at 350 degrees for 40 minutes. Remove the garlic from the foil and squeeze out the roasted garlic from the cut end of the bulbs. With the flat part of a knife spread the roasted garlic into a paste. Heat the Creamy Alfredo Sauce to a low simmer and whisk in the garlic paste. Place the sauce and all of the other ingredients other than the cheese into a two quart baking dish (8”X8”X2”), mix the ingredients in the dish thoroughly. Top with the cheese. Place the baking dish in a 350 degree preheated oven for 35 minutes. Remove from the oven and let rest five minutes.

I guess you can figure out what to do from here.

Monday, December 4, 2006

Chicken Parm Soup

Recipe sent by Christine Goldstein

I saw a variation of this recipe on Rachael Ray. I added some more spices to make it taste more like my parm. Was a BIG HIT!


1 bag frozen ice glazed chicken tenders
(chop them into bite sized pieces before cooking)
1 lg onion
2 Tablespoons garlic
2 bay leaves
2 teaspoons italian seasoning
1 box of chicken broth
1 can of crushed tomatoes
salt and pepper to taste


sliced garlic bread
mozzerella cheese

slice onions in small slices. Brown onions in olive oil until carmelized. Add chicken. Brown in pan until cooked completely. Add seasonings, broth, tomatoes. Cook on low heat min of 15 minutes. (I simmered for a couple of hours)

Place slice of garlic bread in bottom of bowl. Scoop soup on top of bread, place mozzerella on top of soup to melt.

Enjoy!

EDIT:
After a few questions, here is what Christine replied:
One 28 oz can of crushed tomatos, use about 4 lbs. of boneless, skinless chicken breasts, cut into pieces. 4 cups of chicken stock.

Wednesday, November 29, 2006

Huitlacoche enchiladas

This recipe does not have a lot of garlic, but I thought it was interesting to post.

Huitlacoche, or corn smut is the mushroom (fungus) that grows on corn (or maize). Some people think it's gross because it's black, but it's really delicious. It tastes like a combination of mushroom and corn. Here is the whole Wikipedia article on corn smut (link).
There are two steps in making the enchiladas. The first is the huitlacoche filling.
Go to Kensington Market and get a can of huitlacoche at Perola's.
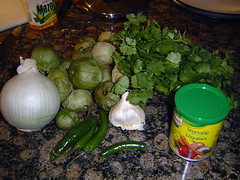
You will also need onion, garlic, serrano chiles, corn oil and salt. The challenge here is actually figuring out the amounts, since I just chopped the ingredients and made the filling without measuring. I used about 3/4 of an onion, 4 cloves of garlic and 3 chiles.
Ingredients
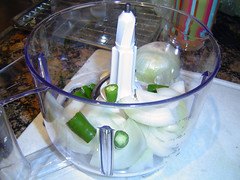
Place the onion, garlic and serrano chiles in the food processor and chop.
Step1
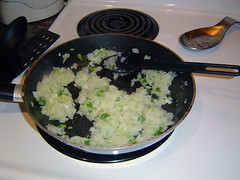
Saute the onion+garlic+chile combination with a pinch of salt on medium heat and about 2 teaspoons of oil.
Saute
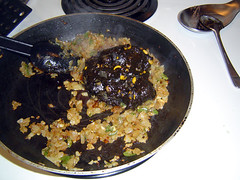
When the onion is brown, add the contents of the can of huitlacoche and saute for about 10 minutes at reduced heat. The huitlacoche is black, do not be turned off by that.
Do not add more salt since the canned huitlacoche is usually already salted.
Huitlacoche
Set aside and proceed to make the sauce.

The ingredients for the green sauce are:
Tomatillos, onion, garlic, cilantro, serrano chile and the "secret" ingredient, a teaspoon of Knorr vegetable broth. Again I don't have specific amounts, I just calculated according to what I had.
Ingredients sauce
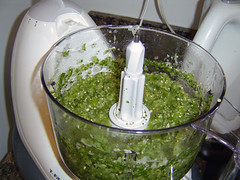
Chop all the ingredients in the food processor until smooth. This is a really good green salsa and you can keep some of it for later use on quesadillas or tacos.
Chop
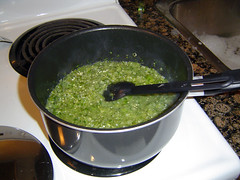
For the enchiladas you need to cook the salsa, I used about 2 teaspoons of corn oil and cooked it in a pot simmering for about 12 minutes.
Cook

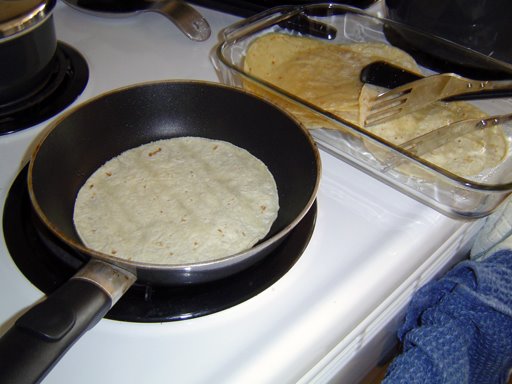
To make enchiladas, the tortillas have to be fried. I calculated 3 enchiladas per person, so I fried 6 tortillas. This has to be done at the last minute because you don't want the tortillas to be cold and soggy when your guests eat.


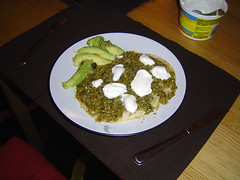
To serve the enchiladas, just after frying the tortilla, fill each one with some hot huitlacoche filling, fold them and cover them in sauce. Serve with sour cream on top. I also served a side of sliced avocado.
Serve

Here's a link to my previous enchilada recipe, another vegetarian meal that I prepared back in May, corn enchiladas.

Thursday, November 23, 2006

Sorry for the lack of posting, I've been SUPER busy. Here's a link for Thanksgiving Turkey with 140 cloves of garlic.
What? 140 cloves of garlic?
Yeah, delicious!

http://www.ibiblio.org/uncpress/chapters/barker_recipes.html

Tuesday, November 7, 2006

Rice with Veggies

This is garlic-intensive, and has one of my favourite ingredients: chick peas!

Ingredients:
1 Cup Chopped onion
1 cup rice
8 large garlic cloves, slivered
1 cup canned chick peas, rinsed and drained
2 cups water
2 teaspoons chicken bouillon powder
1 Cup frozen green beans, thawed
1 Cup butternut squash
1 Cup broccoli florets
1 Cup canned and drained corn kernels
2 Teaspoons soy sauce

Directions:
1. Heat oil in large skillet. Add onion and saute until golden.
2. Add garlic and fry it being careful not to burn it or it will turn bitter.
3. Add rice saute 1 minute.
4. Add 2 cups water and chicken bouillon; bring to boil. Reduce heat, cover tightly and cook until rice is tender and almost all liquid is absorbed, about 35
minutes.
5. Uncover skillet and place green beans, chick peas, squash, broccoli and corn evenly over surface of rice. Cover and cook until vegetables are
crisp-tender, about 10 minutes.
6. Remove from heat. Mix in soy sauce. Toss.
7. Enjoy!

Thursday, November 2, 2006

The Garlic Rose Bistro

Looking around for garlic recipes I ran into this restaurant
The Garlic Rose Bistro in New Jersey
As Garlicster readers know, I have been to Garlics in London Ontario and I sent my parents and sister to go to The Stinking Rose in California.
Has anyone visited The Garlic Rose Bistro? I am seriously thinking of scheduling a trip to New Jersey to visit this restaurant, the menu looks delicious:
Three Onion and Garlic Soup
West Coast Garlic Chowder
Garlic Rose Pork Chop
Garlic Rose Crab Cakes
And other really really delicious things.

Saturday, October 21, 2006

Tonight's dinner, by Mister Anchovy

Brown some short ribs of beef in a dutch oven on the stovetop, gently, using olive oil.
Add:
A carrot or two coarsely chopped
A celery stalk cut the same way
A few old mushrooms I found in the fridge
4 whole garlic cloves
1 very good beer
A few cherry tomatoes tuffy p found in the fridge
A few shakes of worcestershire sauce.
A few shakes of good hot sauce

Preheat the oven to 300f.
Put the lid on the dutch oven and put it in the oven.
Go practice the accordion, make a painting, watch TV, read a book.....for 3 hours.

Feel the love.

cheers,
mister anchovy

Sunday, October 1, 2006

Spaghetti with garlic cream sauce

I love a good pasta and of course I love garlic. This time I wasn't in the mood for a tomato based sauce, so I decided to make a cream based sauce.
Ingredients
1 sticks butter
6 cloves garlic, finely minced
1 pint heavy cream
Salt and pepper to taste
1/2 pound spaghetti cooked al dente
Parmesan cheese (my parmesan cheese was so delicious, I went to the St. Lawrence Market and bought it from Alex Cheese, they grated it for me and it just tastes so good)

Melt butter over medium-low heat. Add garlic but be careful not to brown it. When garlic is cooked stir in heavy cream.
When it is boiling, reduce heat and let sauce barely simmer for about 15 minutes. Season to taste with salt and pepper.

Serve over hot cooked spaghetti and sprinkle with parmesan cheese.

Mmmh, delicious!

Thursday, September 21, 2006

Garlic Brown Sugar Chicken

JadeMarie sent the recipe for this delicious chicken.
1 large chicken, cut into serving pieces
1 cup packed brown sugar
2/3 cup vinegar
1/4 cup Sprite or 7-Up soda
2 to 3 tablespoons minced garlic
2 tablespoons soy sauce
1 teaspoon pepper (regular black or cayenne)

Place chicken in crockpot. Mix all remaining ingredients and pour over chicken. Cook on low for 6-8 hours.
Serve over rice or noodles. You can thicken the juices after cooking with a little cornstarch. http://www.e-cookbooks.net/recipes1/09232.htm

I bet some rice or ramen noodles would be good on the side, along with some stir-fried vegetables.

The website that I found is Garlic Valley Farms Garlic Juices: http://www.garlicvalleyfarms.com/

They have recipes and a ton of interesting links on their website.

Sunday, September 17, 2006

Garlic is just garlic, right?

The following photos were taken by Sam Breach (the website is amazing, full of delicious recipes and great pictures). He she wrote a great and interesting post about garlic that I am reproducing here. The original post can be found here (link)

Garlic is Just Garlic, Right?

Wrong!

2006 san francisco farmers market juicy garlic tasting
Have you ever stopped to think about the garlic you buy? Like tomatoes, like peaches and like potatoes, there are many different varieties of this pungent vegetable too.

2006 san francisco farmers market juicy garlic tasting

Some are mild and some are stronger. Some bulbs have two rings of small cloves, whilst others just have one ring of larger, fatter cloves. Here, from left to right, we have:
1) The Lorz italian, a pre 1900 heirloom.
2) An Inchelium red garlic from an Indian Reservation in East Washington.
3) The "Red Toch" from Tochliavri in Georgia.

I bought these three garlics from the Small Potatoes/Juicy Garlic stand at the San Francisco Ferry Building Farmers Market last Saturday. I was at the market early, before it was too crowded and was able to have a little chat with the farmer, Wallace Condon, about his garlics. He explained to me that he supports Seed Savers, a non-profit organisation who save and share heirloom seed. Seed Savers have several different varieties of garlic available. Condon explained to me that most commercial garlics are what are called "softnecks" but that "stiffnecks" are more interesting with a better flavour. Unfortunately the stiffneck yield is low which is why they are less common. All of the garlics Condon has for sale are the softneck type.

Since I had three stale ears of pain epi from Acme left over from the weekend, I decided that Fred and I should conduct a garlic bread tasting test with the three different varieties of bulb. Here are the results:

Lorz:
Smell: Mild
Garlic Bread: Hot patches on the tongue, moderate level of pungency.
Raw: Very strong, very hot. A long, long hotness and after-taste.

Inchelium:
Smell: Very mild and green.
Garlic Bread: Mild taste but with aftertaste. Slight fishiness in the flavour.
Raw: Hints of green, hot but short burn and long-lasting pungency.

Red Toch:
Smell: Extremely mild, barely detectable garlic smell.
Garlic Bread: Almost transparent as far as garlic goes, no bite, slightly sweet.
Raw: Slightly hot when tasted raw with a longer-lasting burn.

It has been an interesting excercise to compare and contrast these garlics and have the opportunity to judge which dish would benefit from which garlic. Often we don't have a choice or this kind of information at our fingertips when making our garlic purchases. Condon, of Small Potatoes, told me that he probably had only about two weeks worth of garlic left for sale at the market. So... you'll have to get in there quick if you want to taste the differences for yourself.

Monday, September 11, 2006

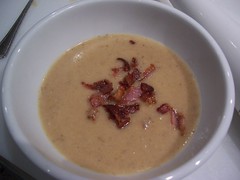
Toasted Garlic and Five Onion Soup

This recipe and picture were taken from Shasta MacNasty's Flickr page. Here is a link to her website, she has lots of garlic stuff there too. Delicious!

1 slice bacon, diced small
4 tablespoons olive oil
1/4 leek, sliced
4 scallions, sliced
1 shallot, sliced
1/2 white onion, sliced
1/2 vidaliia onion, sliced
1 head garlic, sliced
8 sprigs thyme, minced
1 bay leaf
3/4 cup white wine
3 cups chicken stock
1 small backing potato, peeled, and diced small
1/2 cup heavy cream
salt and black pepper

1. Place a 3 quart chefs pan over medium heat and add diced bacon. Cook until crisp and then remove bacon bits.
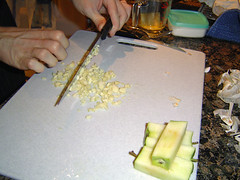
2. Add the olive oil, leeks, scallions, shallots, white and vidalia onions, and garlic.

3. Allow the onions and garlic to caramelize, about 15 minute. Stir in the thyme and bay leaf.

4. Deglaze the pan with white wine. Be sure to scrape the fond off the bottom of the pan with a wooden spoon.
5. Pour in the chicken stock and bring the soup to a boil. Add the diced potatoes.

6. Reduce the heat and simmer for 15 minutes or until the potatoes and onions are tender.

7. Puree the soup with a hand held emersion blender.

8. Stir in the cream and adjust the seasoning with salt and black pepper.

9. Garnish with bacon bits and serve hot.


Serves 4

Friday, September 8, 2006

Roasted garlic and tomato pizza

I looooove grape tomatoes. I just like them because they are tiny, and you can eat them in a mouthful or chop them and they are so cute.
I made up this roasted garlic and tomato pizza using Pillsbury's pre-made pizza dough (so convenient!).
Ingredients:
1 whole head garlic
2 spoonfuls olive oil
salt
1 package Pillsbury pizza dough
1 pint grape tomatoes sliced tiny
Half a package Kraft pizza cheese combination (or as much cheese as you want)
Fresh basil leaves

Instructions:
Roast the head of garlic by slicing off the top and sprinkling it with olive oil and some salt wrapped in foil, put it in the oven for about 50 minutes at 400 degrees F.
Roll out pizza dough in a baking sheet according to instructions, squeeze the roasted garlic (be careful that it cools a little bit, you don't want to burn your hands), brush with some olive oil and sprinkle the tomatoes, basil leaves and cheese. Bake in the oven at 425 degrees F for about 20 minutes or until cheese is melted.
Delicious and garlicky!

Wednesday, September 6, 2006

Garlic Meatloaf

I was in the mood for good old-fashioned meatloaf and I wanted it really garlicky.
I am re-posting this recipe from June 2005.

3lbs. ground beef
2 1/2 lg. cloves garlic, minced
1 green bell pepper, chopped
1/2 lg. red onion, chopped
1 1/2 c. bread crumbs (Torn hamb. or hot dog bunns work better than reg. bread)
2 eggs
1/4 c. colby cheese
4oz. crushed tomatoes
1pkg. store brand meatloaf mix

Heat oven to 400 deg.
Mix all ing. well with hands, and form into a loaf
Flatten into appropriatly sized baking dish (I use glass)
Cook 1 hr. without opening oven door
After 1 hr. lightly cover top with katsup
An additional 30 min. it should be cooked through and have a nice brown crust
Cool 15 min. and serve