Aricthered sent a comment about the roasted garlic recipes we've posted:
"Using whole heads of garlic I remove the skin, wrap them in tin foil and place the foil wrapped garlic heads arround the coals under the grill. No seasings or oils are used on the garlic and we squeeze the garlig heads on to bread just as in the other recipe".
Thanks, perfect timing for barbecue season!
Tuesday, March 28, 2006


Thursday, March 23, 2006
Garlic after-smell
Lina sent this question:
I love garlic but my breathe and/or my pores really let everyone know it after eating it.
Do you have an answer as to how I can prevent everyone knowing when I eat garlic?
Thanks in advance,
Linda
I really have no idea how to do it short of having everyone in your party/house/family eat garlic with you. Does anyone have any suggestions?
I love garlic but my breathe and/or my pores really let everyone know it after eating it.
Do you have an answer as to how I can prevent everyone knowing when I eat garlic?
Thanks in advance,
Linda
I really have no idea how to do it short of having everyone in your party/house/family eat garlic with you. Does anyone have any suggestions?
Thursday, March 16, 2006
Baked or Fried Potato Skins with Aioli Sauce Dip
In celebration of St. Patrick's Day, JadeMarie sent this recipe:
An old Irish saying goes that "Only two things in this world are too serious to be jested on, potatoes and matrimony." This recipe is a perfect appetizer for a St. Patrick's Day party, very easy to make, and absolutely delicious.
Ingredients
2 - 6 medium potatoes
3 tbsp. melted butter (for baked skins)
coarse salt
oil for deep frying (fried skins)
Aioli Sauce Dip
cooked pulp of 2 med. potatoes
8 cloves garlic, crushed
1 c. virgin olive oil
1 egg yolk
1 tsp. lemon juice
Scrub potatoes, rinse well and pat dry. Pierce the skins several time with a
fork. Bake in a 350 degree oven for 45 minutes or until tender (or microwave on HIGH for 8 minutes). Let stand 4 minutes to cool slightly, cut in half, then scoop out flesh (set aside to use for the dip) This will leave an approximately 1/2 inch thick potato shell. Take a sharp knife, and cut shells into eight equal sections.
For baked skins, brush inside and outside with melted butter and sprinkle with coarse salt. Place on a baking sheet lined with tinfoil and bake at 475 degrees for 10-15 minutes until crisp.
For fried skins, heat oil and fry skins until crisp. Drain on paper towels.
To prepare the sauce:
Combine potato pulp, garlic and half the oil in a blender and blend until smooth. Add egg yolk and slowly add the remaining oil and the lemon juice.
If sauce seems too thick, add a teaspoon or two of water. Serve sauce in a dip bowl surrounded by potato skins.
And, of course, GREEN BEER!
An old Irish saying goes that "Only two things in this world are too serious to be jested on, potatoes and matrimony." This recipe is a perfect appetizer for a St. Patrick's Day party, very easy to make, and absolutely delicious.
Ingredients
2 - 6 medium potatoes
3 tbsp. melted butter (for baked skins)
coarse salt
oil for deep frying (fried skins)
Aioli Sauce Dip
cooked pulp of 2 med. potatoes
8 cloves garlic, crushed
1 c. virgin olive oil
1 egg yolk
1 tsp. lemon juice
Scrub potatoes, rinse well and pat dry. Pierce the skins several time with a
fork. Bake in a 350 degree oven for 45 minutes or until tender (or microwave on HIGH for 8 minutes). Let stand 4 minutes to cool slightly, cut in half, then scoop out flesh (set aside to use for the dip) This will leave an approximately 1/2 inch thick potato shell. Take a sharp knife, and cut shells into eight equal sections.
For baked skins, brush inside and outside with melted butter and sprinkle with coarse salt. Place on a baking sheet lined with tinfoil and bake at 475 degrees for 10-15 minutes until crisp.
For fried skins, heat oil and fry skins until crisp. Drain on paper towels.
To prepare the sauce:
Combine potato pulp, garlic and half the oil in a blender and blend until smooth. Add egg yolk and slowly add the remaining oil and the lemon juice.
If sauce seems too thick, add a teaspoon or two of water. Serve sauce in a dip bowl surrounded by potato skins.
And, of course, GREEN BEER!
Sunday, March 12, 2006
Garlicky Bread Soup
JadeMarie sent a delicious recipe for Garlicky Bread Soup:
Garlicky Bread Soup
By Cait Johnson, author of Witch in the Kitchen (Inner Traditions, 2001).
Simple Solution
More people I know have succumbed to colds and flus this March than in the middle of winter. That's where a bowl of this soothing, restorative soup can come in handy: garlic is a known immune-booster, and this recipe--based on soups beloved by wise peasants in the Mediterranean--delivers health-promoting nourishment with every luscious bite. It's also inexpensive and simple to make.
Even if you're feeling in top form, Garlicky Bread Soup is a tasty and beneficial way to keep the winds of March at bay. Here is the recipe:
INGREDIENTS
2 tablespoons olive oil
2 cups chopped onions
16 garlic cloves, finely minced
2 quarts water
1/2 teaspoon dried rosemary
1 teaspoon dried thyme
2 medium russet potatoes, peeled and diced
2 carrots, peeled and sliced thinly into rounds
1/2 cup sherry
Salt and freshly-ground black pepper, to taste
4 thick slices of good-quality bread
1/4 cup grated Parmesan cheese (optional)
1. Heat the olive oil over medium heat in a large soup pot. Add onions and saute, stirring frequently, for 10 minutes, until softened. Add garlic and saute 5 minutes more.
2. Add water and herbs, bring to a boil, then reduce heat to low and simmer soup for 15 minutes. Add potatoes and carrots and simmer for another 15 minutes, or until potatoes are tender. Add sherry and continue to simmer an additional 5 minutes.
3. Season to taste with salt and pepper. Place a bread slice in the bottom of each soup bowl, ladle the soup over the bread, and serve hot, garnished with the cheese, if desired.
Serves 4.
Garlicky Bread Soup
By Cait Johnson, author of Witch in the Kitchen (Inner Traditions, 2001).
Simple Solution
More people I know have succumbed to colds and flus this March than in the middle of winter. That's where a bowl of this soothing, restorative soup can come in handy: garlic is a known immune-booster, and this recipe--based on soups beloved by wise peasants in the Mediterranean--delivers health-promoting nourishment with every luscious bite. It's also inexpensive and simple to make.
Even if you're feeling in top form, Garlicky Bread Soup is a tasty and beneficial way to keep the winds of March at bay. Here is the recipe:
INGREDIENTS
2 tablespoons olive oil
2 cups chopped onions
16 garlic cloves, finely minced
2 quarts water
1/2 teaspoon dried rosemary
1 teaspoon dried thyme
2 medium russet potatoes, peeled and diced
2 carrots, peeled and sliced thinly into rounds
1/2 cup sherry
Salt and freshly-ground black pepper, to taste
4 thick slices of good-quality bread
1/4 cup grated Parmesan cheese (optional)
1. Heat the olive oil over medium heat in a large soup pot. Add onions and saute, stirring frequently, for 10 minutes, until softened. Add garlic and saute 5 minutes more.
2. Add water and herbs, bring to a boil, then reduce heat to low and simmer soup for 15 minutes. Add potatoes and carrots and simmer for another 15 minutes, or until potatoes are tender. Add sherry and continue to simmer an additional 5 minutes.
3. Season to taste with salt and pepper. Place a bread slice in the bottom of each soup bowl, ladle the soup over the bread, and serve hot, garnished with the cheese, if desired.
Serves 4.
Sunday, March 5, 2006
Spanish Pork Chops
Recipe sent by IWANT.
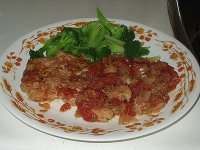
Ingredients.....
4 pork chops (any cut you like and trim all the fat off them)
3 large cans of chopped tomatoes or the equivalent of your own if you do them. STRAIN them! Get out all the juice as you don't need it. Simmering these will produce more juice.
2 chopped onions
two or three cloves of minced fresh garlic (depends on your tastes)
2 tablespoons approx. of Italian spice mixture or use oregano, basil and thyme (about a couple of teaspoons each) I actually just throw it in so the measurements for the spices are approx.
- You will need a deep pan for this. A regular frying pan won't do it, it will overflow when it starts to simmer. I have a large pot/pan. As large around as a large frying pan but about 3 inches high.
- pour the tomatoes in the pan. Then mix in the onions, then the spices including the garlic. If you wish to saute the garlic first be my guest but watch it doesn't burn.
- now, you have everything in the pan but the chops. Time to get your hands dirty. Moosh aside the tomatoe mixture a bit and being putting the chops in there. 4 will fit nicely. Once they are in, pull a bit of that tomato mixture over top of them and try to cover them in it the best you can. When it starts to simmer it will bubble up so don't worry if it isn't perfect.
- put it on medium heat and simmer them for 1 & a 1/2 hours. Check them now and then but they really do cook themselves with little running back and forth. Just make sure they are not boiling at a heavy rate. I usually end up turning them down to about 2 or 3 later on.
- now that that is done, wash and scrub 4 potatoes and pop them in the oven for the same amount of time.
These chops will literally fall off the bone they are so tender. This recipe also produces lots of sauce so there is plenty for each chop and the potatoes. These make great leftovers too.

Ingredients.....
4 pork chops (any cut you like and trim all the fat off them)
3 large cans of chopped tomatoes or the equivalent of your own if you do them. STRAIN them! Get out all the juice as you don't need it. Simmering these will produce more juice.
2 chopped onions
two or three cloves of minced fresh garlic (depends on your tastes)
2 tablespoons approx. of Italian spice mixture or use oregano, basil and thyme (about a couple of teaspoons each) I actually just throw it in so the measurements for the spices are approx.
- You will need a deep pan for this. A regular frying pan won't do it, it will overflow when it starts to simmer. I have a large pot/pan. As large around as a large frying pan but about 3 inches high.
- pour the tomatoes in the pan. Then mix in the onions, then the spices including the garlic. If you wish to saute the garlic first be my guest but watch it doesn't burn.
- now, you have everything in the pan but the chops. Time to get your hands dirty. Moosh aside the tomatoe mixture a bit and being putting the chops in there. 4 will fit nicely. Once they are in, pull a bit of that tomato mixture over top of them and try to cover them in it the best you can. When it starts to simmer it will bubble up so don't worry if it isn't perfect.
- put it on medium heat and simmer them for 1 & a 1/2 hours. Check them now and then but they really do cook themselves with little running back and forth. Just make sure they are not boiling at a heavy rate. I usually end up turning them down to about 2 or 3 later on.
- now that that is done, wash and scrub 4 potatoes and pop them in the oven for the same amount of time.
These chops will literally fall off the bone they are so tender. This recipe also produces lots of sauce so there is plenty for each chop and the potatoes. These make great leftovers too.
Wednesday, March 1, 2006
Garlic Burgers
Andrea sent this email with her Garlic Burgers recipe:
Flavor up your hamburgers with a clove of garlic in each patty! When I was out of my usual seasoning that I love, I decided to season with garlic instead. This is my favorite way to cook hamburgers now and works well on a George Foreman Grill.
Garlic is the only seasoning I add because I put ketchup, onions, mayo on my hamburgers. Just spread a clove of pressed garlic on some ground chuck which you're going to form into a patty, fold over the ground beef to hide the garlic and shape into a patty. Grill till done. As the hamburger cooks the juices spread the garlic taste--so each bite will taste delicious.
Sounds really good, and I do have the George Foreman Grill. I may just have to make them soon.
Flavor up your hamburgers with a clove of garlic in each patty! When I was out of my usual seasoning that I love, I decided to season with garlic instead. This is my favorite way to cook hamburgers now and works well on a George Foreman Grill.
Garlic is the only seasoning I add because I put ketchup, onions, mayo on my hamburgers. Just spread a clove of pressed garlic on some ground chuck which you're going to form into a patty, fold over the ground beef to hide the garlic and shape into a patty. Grill till done. As the hamburger cooks the juices spread the garlic taste--so each bite will taste delicious.
Sounds really good, and I do have the George Foreman Grill. I may just have to make them soon.
Monday, February 27, 2006
Braised short ribs
Mr. Anchovy made these during the weekend:
You need:
1 Dutch oven
Lots of thick cut short ribs.
thyme
summer savory
salt & pepper
beer
several cloves of chopped fresh garlic
worcestershire sauce
indonesian soy sauce
oil
butter
flour
Brown the short ribs thoroughly, a few at a time, in the dutch oven, on the stove top, in oil - then take them out and put them into a bowl.
Deglaze the pot with beer.
Add the short ribs back in.
Add enough beer to almost cover the short ribs
Add lots of thyme and summer savory
Add the garlic
Add several healthy shakes of worcestershire sauce
Add about a tablespoon of Indonesian Soy sauce (optional)
Put the lid on the dutch oven and place in a 350 oven
Cook for about 3 hours
Halfway through, take it out, and mix everything around
When cooking is complete, take the short ribs out of their liquid
Mix together soft butter and flour to form a smooth paste
Add the paste to the sauce and mix together until the paste is well desolved
Cook the sauce on a medium-low heat on the stove top for about 3 minutes to cook the flour.
Meanwhile, make a batch of smashed potatoes, and perhaps some steamed broccoli
Serve, drizzling sauce over the short ribs and potatoes
Feel the love.
You need:
1 Dutch oven
Lots of thick cut short ribs.
thyme
summer savory
salt & pepper
beer
several cloves of chopped fresh garlic
worcestershire sauce
indonesian soy sauce
oil
butter
flour
Brown the short ribs thoroughly, a few at a time, in the dutch oven, on the stove top, in oil - then take them out and put them into a bowl.
Deglaze the pot with beer.
Add the short ribs back in.
Add enough beer to almost cover the short ribs
Add lots of thyme and summer savory
Add the garlic
Add several healthy shakes of worcestershire sauce
Add about a tablespoon of Indonesian Soy sauce (optional)
Put the lid on the dutch oven and place in a 350 oven
Cook for about 3 hours
Halfway through, take it out, and mix everything around
When cooking is complete, take the short ribs out of their liquid
Mix together soft butter and flour to form a smooth paste
Add the paste to the sauce and mix together until the paste is well desolved
Cook the sauce on a medium-low heat on the stove top for about 3 minutes to cook the flour.
Meanwhile, make a batch of smashed potatoes, and perhaps some steamed broccoli
Serve, drizzling sauce over the short ribs and potatoes
Feel the love.
Thursday, February 23, 2006
Fowl garlic breath
In honour of Garlicster, A Food Year has this beautiful post about garlic:
Go visit A Food Year for more delicious recipes, one different recipe each day.
"Garlic is one of the most inexpensive, healthiest and tastiest things you could put into your mouth. There are many tools dedicated solely for garlic (the garlic press, garlic roaster etc.) and many more ways to use it beyond cooking (ointments, medicine etc.) It can be found in cuisines throughout the world; from Italy to Thailand, and is used in many different ways. The more garlic you eat, the more it becomes a part of your life. It even permeates your body so that you breathe and sweat it! Yes, garlic helps you repel unwanted company while simultaneously encouraging you to brush your teeth and bathe. Garlic doesn't pretty much whatever your heart desires (and it's good for your heart, too!)
I tried to use garlic in as many ways that I could think of without needing a steep cup of ginger tea to soothe my stomach after dinner. Not surprisingly, ginger also pairs with garlic quite nicely. We had it raw, roasted, fried and steeped; which covers a wide variety of garlic's culinary uses. If you wish to continue the garlic adventure, check out Garlicster, the blog dedicated entirely to garlic related content.
It wasn't hard to determine what dishes I was going to make once I decided I was going to do a garlic themed dinner. My first dish was Chicken with Roasted Garlic. The skin is quickly crisped and then the heat is reduced to allow for beautiful caramelization. The natural sugars from the onion and garlic are brought out from the process taking away from the bitterness and leaving behind a delicious flavor.
I placed the chicken on Garlic Risotto with Peas and allowed the drippings to seep into the rice. This was the only dish that was below perfect in tonight's dinner. I had rushed the making of the garlic broth and the flavor was not as pronounced as I had expected. My risotto was also not very creamy, which is the first time I've ever had a bad experience making risotto before. I'm not entirely sure what happened.
On the side were a Whole Roasted Potatoes with Garlic and some Braised Garlic Broccoli. The potatoes are first boiled to soften and then allowed to bake until crisp, giving them a great texture. They are then rolled in raw garlic to give them a nice bite. If you minced your garlic and leave it on the counter while the potatoes are baking the flavor is enhanced. If you wish to diminish the bite of the raw garlic, chop instead of mince it or simply cook it. I think that broccoli and garlic are wonderful together, like garlic and pretty much anything is. The braising allowed the broccoli to soften and absorb the flavor of the garlic.
To help with cleaning up after this meal, a little lemon juice can help to take the smell away. Just rub a cut lemon on your cutting board and on your hands and you're good to go. Of course, garlic is wonderful with lemon as a sauce or dressing instead of a cleanser, so feel free to squeeze some of that juice on your plate before you take it to the counters."
Go visit A Food Year for more delicious recipes, one different recipe each day.
Sunday, February 19, 2006
Guest blogging by Wendy: Slow Food Guide to San Francisco
A few weeks ago, Chelsea Green Publishing sent me two books. One of them is about the new trend of "slow food":
I thought it was a bit weird that they sent a book about San Francisco all the way to Toronto, but surprise, surprise, Wendy just went to San Francisco last week, so she took the book with her. I am honoured to have her as a guest blogger today:
"The Slow Food Guide to San Francisco and the Bay Area" by Sylvan Brackett, Sue Moore, and Wendy Downing with Slow Food USA
I'd never really explored San Francisco before, and it was definitely fun to have a restaurant book in hand when I had the chance to do so. The only problem with the book is that it is highly selective - it would have to be, of course, sponsored as it is by Slow Food, but it's not all that useful for someone who's a stranger to the city and wants to eat lunch near her hotel.
The reviews were beautifully written - not a single complaint there. Unfortunately, they say more about the atmosphere and mode of the restaurants, and less about the actual dishes available to eat. I went to Limon for dinner, and Tartine for lunch, both in the Mission district.
Limon: Here, I actually ate a dish described in the review - the Ceviche Limon. The book reads, "The signature dish, ceviche limon, is a generous sampling of raw fish marinated in lime juice, served with yams and Peruvian corn." Well, sure it is. But I would describe it differently, perhaps this way: "The signature dish, ceviche limon, includes a variety of shellfish as well as halibut, marinated in lime juice. Completing the plate is a sweet slice of yam to offset the acidity, and two types of Peruvian corn - some is soft and joins the fish in the marinade, and some is toasted, to add a welcome crunchy texture." Do it justice, people! It was very good - I preferred it to my main dish, Lomo Saltado, a very traditional dish of beef, tomatoes, onions and potatoes, which was tasty but not extraordinary. And even though it is a ubiquitous Peruvian dish - our waiter said we wouldn't find a Peruvian restaurant without it - it is not mentioned in the review.
Tartine: This is actually in the section of the book devoted to markets, as it is a bakery/cafe. At Tartine, I ate one of the most delicious sandwiches of my life - technically a "pressed sandwich," it was a sampler of three different small grilled cheeses, accompanied by weird but yummy little pickled carrots. My lunch companion had the quiche, which was glowingly mentioned in the Slow Food review - it actually looked a bit overbaked, but she said it was very good. This place proved the point that the experience, even though that was the focus of the review, described in a book is not always accurate. We had no problem getting a table at around 1pm, and the line moved smoothly, both contrary to what was written in the book.
For those devoted to or curious about Slow Food, this is obviously the right book. For Josephine Traveller, like me - you might want to pick up a Zagat's.
Slow food is a growing international movement committed to sustainable agriculture, local food traditions, and the honest pleasures of the table. More than 80,000 members worldwide have fought successfully to protect raw milk cheeses, heritage breeds of American turkeys, and many other outstanding foods that are either threatened or simply deserve to be more widely known and enjoyed.
I thought it was a bit weird that they sent a book about San Francisco all the way to Toronto, but surprise, surprise, Wendy just went to San Francisco last week, so she took the book with her. I am honoured to have her as a guest blogger today:
"The Slow Food Guide to San Francisco and the Bay Area" by Sylvan Brackett, Sue Moore, and Wendy Downing with Slow Food USA
I'd never really explored San Francisco before, and it was definitely fun to have a restaurant book in hand when I had the chance to do so. The only problem with the book is that it is highly selective - it would have to be, of course, sponsored as it is by Slow Food, but it's not all that useful for someone who's a stranger to the city and wants to eat lunch near her hotel.
The reviews were beautifully written - not a single complaint there. Unfortunately, they say more about the atmosphere and mode of the restaurants, and less about the actual dishes available to eat. I went to Limon for dinner, and Tartine for lunch, both in the Mission district.
Limon: Here, I actually ate a dish described in the review - the Ceviche Limon. The book reads, "The signature dish, ceviche limon, is a generous sampling of raw fish marinated in lime juice, served with yams and Peruvian corn." Well, sure it is. But I would describe it differently, perhaps this way: "The signature dish, ceviche limon, includes a variety of shellfish as well as halibut, marinated in lime juice. Completing the plate is a sweet slice of yam to offset the acidity, and two types of Peruvian corn - some is soft and joins the fish in the marinade, and some is toasted, to add a welcome crunchy texture." Do it justice, people! It was very good - I preferred it to my main dish, Lomo Saltado, a very traditional dish of beef, tomatoes, onions and potatoes, which was tasty but not extraordinary. And even though it is a ubiquitous Peruvian dish - our waiter said we wouldn't find a Peruvian restaurant without it - it is not mentioned in the review.
Tartine: This is actually in the section of the book devoted to markets, as it is a bakery/cafe. At Tartine, I ate one of the most delicious sandwiches of my life - technically a "pressed sandwich," it was a sampler of three different small grilled cheeses, accompanied by weird but yummy little pickled carrots. My lunch companion had the quiche, which was glowingly mentioned in the Slow Food review - it actually looked a bit overbaked, but she said it was very good. This place proved the point that the experience, even though that was the focus of the review, described in a book is not always accurate. We had no problem getting a table at around 1pm, and the line moved smoothly, both contrary to what was written in the book.
For those devoted to or curious about Slow Food, this is obviously the right book. For Josephine Traveller, like me - you might want to pick up a Zagat's.
Wednesday, February 15, 2006
Garlic baked cauliflower
As published in A Food Year:
4 cups cauliflower flowerets
4 cloves garlic, minced
2 tablespoons olive oil
½ cup grated parmesan cheese
Salt and pepper
Preheat oven to 400°.
Place cauliflower in a casserole dish and sprinkle with minced garlic and lemon juice.
Drizzle olive oil over cauliflower and bake until the top is lightly browned. Continue baking until desired tenderness, if necessary.
Remove from the oven and cover with parmesan cheese.
Makes 4 servings
4 cups cauliflower flowerets
4 cloves garlic, minced
2 tablespoons olive oil
½ cup grated parmesan cheese
Salt and pepper
Preheat oven to 400°.
Place cauliflower in a casserole dish and sprinkle with minced garlic and lemon juice.
Drizzle olive oil over cauliflower and bake until the top is lightly browned. Continue baking until desired tenderness, if necessary.
Remove from the oven and cover with parmesan cheese.
Makes 4 servings
Saturday, February 11, 2006
Grilled tomato and garlic soup
Nina published the recipe for grilled tomato and garlic soup. It really looks delicious.

You'll need: tomatoes, garlic, spices and milk.
The above, I think, came to me through the form of Jamie Oliver again. I'm not exactly sure if it had anything directly to do with a specific recipe or not. I have a hard time sticking to recipes, unless they are for baking. I don't want to take any chances with baking, usually. But everything else is fair game.
The above is very very simple, but it will take a little bit of time to prepare. You chop your nice ripe, big and juicy tomatoes and arrange them on a baking tray, adding a lot of garlic cloves. How many really depends on you. I love the rich flavour of grilled garlic! The trick here is to separate the cloves, but not peel them, just give them a bash with something heavy, so they will split, but still retain the peel. Season with salt, pepper and some spices of your choice. It can easily be basil, fresh or dry. It's the best choice for this soup. Alternatively, you can use thyme or oregano. Or be creative.
Grill the tomatoes and garlic on high temperature until the edges are a little sooty. Then scoop everything into your blender, blend well and pour everything in a pot. Slowly bring to a simmer and add milk progressively, not too much at a time, so you can stop at your preferred form and density of soup. Keep tasting the soup, making sure it's well seasoned. It is truly so full of taste, the way soups usually aren't. I accompanied it with a simple wrap (tortilla) with mayonnaise, ham and cucumber, just to have a bit of something to chew on on the side.
You'll need: tomatoes, garlic, spices and milk.
The above, I think, came to me through the form of Jamie Oliver again. I'm not exactly sure if it had anything directly to do with a specific recipe or not. I have a hard time sticking to recipes, unless they are for baking. I don't want to take any chances with baking, usually. But everything else is fair game.
The above is very very simple, but it will take a little bit of time to prepare. You chop your nice ripe, big and juicy tomatoes and arrange them on a baking tray, adding a lot of garlic cloves. How many really depends on you. I love the rich flavour of grilled garlic! The trick here is to separate the cloves, but not peel them, just give them a bash with something heavy, so they will split, but still retain the peel. Season with salt, pepper and some spices of your choice. It can easily be basil, fresh or dry. It's the best choice for this soup. Alternatively, you can use thyme or oregano. Or be creative.
Grill the tomatoes and garlic on high temperature until the edges are a little sooty. Then scoop everything into your blender, blend well and pour everything in a pot. Slowly bring to a simmer and add milk progressively, not too much at a time, so you can stop at your preferred form and density of soup. Keep tasting the soup, making sure it's well seasoned. It is truly so full of taste, the way soups usually aren't. I accompanied it with a simple wrap (tortilla) with mayonnaise, ham and cucumber, just to have a bit of something to chew on on the side.
Monday, February 6, 2006
Garlic mousse
This weekend I made a delicious salmon mousse, and thought I could do something similar with garlic.
The secret to a good mousse is to fold the whipped cream so that it doesn't flatten. It adds the much needed texture to the mousse.
Here is the recipe:
4 whole heads of garlic
Olive oil
1 cup white wine, boiling hot
1 envelope (15 ml) gelatin
4 green onions, chopped
250 ml (1 cup) heavy cream (whipping cream 35%)
Salt and white pepper to taste
Rub heads of garlic and wrap in aluminium foil, roast them in oven for about 45 minutes.
When the garlic is nice and soft, peel the garlic heads, set aside.
Disolve gelatin in boiling white wine and put in food processor with the green onions, chop the green onions in the food processor. Add the peeled garlic, mix the ingredients in the food processor.
Whip the cream separately and fold it into garlic mixture. Keep mixing with the food processor careful not to flatten the whipped cream.
Season with salt and white pepper to taste.
Pour into mold and refrigerate for about 12 hours.
Serve with crackers!
The secret to a good mousse is to fold the whipped cream so that it doesn't flatten. It adds the much needed texture to the mousse.
Here is the recipe:
4 whole heads of garlic
Olive oil
1 cup white wine, boiling hot
1 envelope (15 ml) gelatin
4 green onions, chopped
250 ml (1 cup) heavy cream (whipping cream 35%)
Salt and white pepper to taste
Rub heads of garlic and wrap in aluminium foil, roast them in oven for about 45 minutes.
When the garlic is nice and soft, peel the garlic heads, set aside.
Disolve gelatin in boiling white wine and put in food processor with the green onions, chop the green onions in the food processor. Add the peeled garlic, mix the ingredients in the food processor.
Whip the cream separately and fold it into garlic mixture. Keep mixing with the food processor careful not to flatten the whipped cream.
Season with salt and white pepper to taste.
Pour into mold and refrigerate for about 12 hours.
Serve with crackers!
Sunday, January 29, 2006
Voodoo Bruschetta
Recipe re-sent by CathrineQ, whose husband I met on Friday:
Ingredients:
* 3/4 to 1 lb pizza dough
* 6-8 ripe plum tomatoes
* 2 tablespoon finely chopped red onion (optional)
* 2 cloves to 2 buds crushed garlic
* 1/4 cup chopped fresh basil or several tablespoon of pesto
* 2 teaspoon red wine vinegar or lemon juice
* 1-4 tablespoon olive oil
* 1-2 teaspoon or tablespoon chilli paste (found in Asian
section of supermarket)
* salt & pepper to taste
* 10-20 pitted kalmatta olives, chopped
* Parmesan, grated
Directions:
Cut tomatoes in half and squeeze out the seeds. Chop tomatoes into small dice; place in bowl. Add onion, garlic, basil or pesto, vinegar or lemon juice, chili paste, olives, salt & pepper to taste.
Let stand for about an hour. Drain liquid if desired. Roll out pizza dough into a thin rounded rectangle. Bake pizza dough at 400 degrees for 20 minutes, until lightly browned. Spread with tomato mixture.
Top with the Parmesan. Enjoy. (As for the garlic, go big or go home!!)
Serves: 4
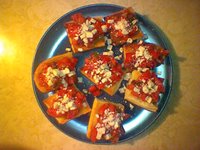
Ingredients:
* 3/4 to 1 lb pizza dough
* 6-8 ripe plum tomatoes
* 2 tablespoon finely chopped red onion (optional)
* 2 cloves to 2 buds crushed garlic
* 1/4 cup chopped fresh basil or several tablespoon of pesto
* 2 teaspoon red wine vinegar or lemon juice
* 1-4 tablespoon olive oil
* 1-2 teaspoon or tablespoon chilli paste (found in Asian
section of supermarket)
* salt & pepper to taste
* 10-20 pitted kalmatta olives, chopped
* Parmesan, grated
Directions:
Cut tomatoes in half and squeeze out the seeds. Chop tomatoes into small dice; place in bowl. Add onion, garlic, basil or pesto, vinegar or lemon juice, chili paste, olives, salt & pepper to taste.
Let stand for about an hour. Drain liquid if desired. Roll out pizza dough into a thin rounded rectangle. Bake pizza dough at 400 degrees for 20 minutes, until lightly browned. Spread with tomato mixture.
Top with the Parmesan. Enjoy. (As for the garlic, go big or go home!!)
Serves: 4
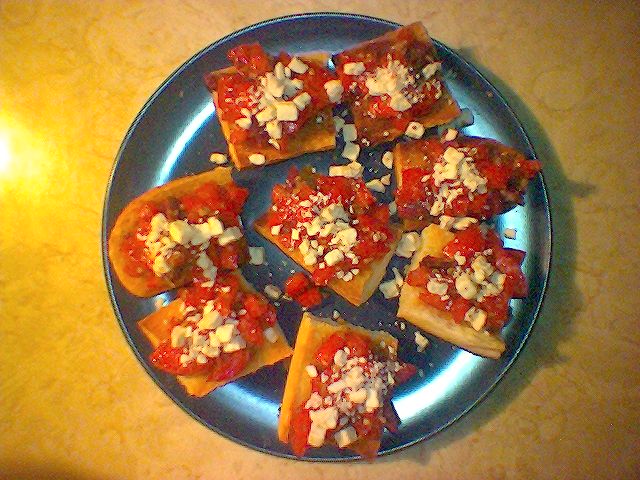
Picture courtesy of The Wingnuterer.
Tuesday, January 24, 2006
Toasted garlic
DeAnne sent this email:
This is how I'd do it:
1. Chop the garlic
2. Place it on a tray
3. Sprinkle with just a little bit of olive oil
4. Put in toaster oven for no more than 3 minutes
Any other ideas?
I recently went to a new restraunt in town and they had fresh bread with a dipping oil. First they place a dried and crushed garlic/spice mixture on a plate and add the oil. It was great and I have tried to "create" a version of it at home with no luck. How in the world do you toast chopped garlic? Any great recipies? Thanks! DeAnne
This is how I'd do it:
1. Chop the garlic
2. Place it on a tray
3. Sprinkle with just a little bit of olive oil
4. Put in toaster oven for no more than 3 minutes
Any other ideas?
Wednesday, January 18, 2006
This just in
Earlier this week I got this email:
Sounds like a good idea, doesn't it?
Hello there,
I've just been randomly searching food blogs and stumbled upon yours.
I love garlic! It will definitely pop up on my website from time to time. It is called A Food Year and it documents my efforts to eat a different dinner every day of the year. There are pictures, recipes and anecdotes. If this sounds like something you'd be interested in, check it out at www.afoodyear.com
If not, no problem. Just sharing my link with like-minded individuals :)
Ken Sloan
Sounds like a good idea, doesn't it?
Sunday, January 8, 2006
Risotto
According to Mister Anchovy:
Chop up:
Shallots
A few cloves of garlic
An onion
A green or red pepper
Some cremini mushrooms
Soak:
Some dried chantrelles in a cup of water for a half hour. Chop them up, and add the liquid to the stock.
Grate:
Some fontina and some obsenely good parmagiano cheeses....a big handful of each, grated roughly!
Open:
A bottle of white wine that has been sitting around the house because you prefer drinking red.
A bottle of nice shiraz you can drink while cooking the rizotto. This recipe cannot be prepared without drinking wine while cooking.
Heat up:
Some really good soup stock....best is homemade veggie stock, but use what you have.
Chop up:
A couple ripe tomatoes and a few sundried tomatoes. Also chop some fresh basil and thyme, a handful of each.
Saute (on medium heat):
In amazingly good olive oil (we use Salah's gold), the shallots, garlic, onion and pepper, for a few minutes. Add some kosher salt to taste.
Add the mushrooms. Note, the mushrooms should be in larger rather than smaller chunks.
Add:
About 4 cups of arborio or other suitable short grained Italian style rice. You want to make enough for guests + leftovers tomorrow. Add in a ladle full of stock and pour in a few splashes of white wine. Add the herbs. As the rizotto sucks up the liquid, freely add white wine and stock. Add the chantrelles. Add the sun-dried tomatoes. Pour yourself another glass of red, and enjoy a few sips. Keep stirring. Always use a wooden spoon. We do our rizotto in a great big heavy bottom skillet, by the way, and that works out perfectly. Somewhere along the way, remember that you have chopped up some tomatoes and toss them in. Keep adding stock and wine as the rizotto cooks, until the rice is getting tender but still has some body and character about it.
Add:
The cheese. Stir it in. Then add a splash of heavy cream, and stir it around again. Add fresh ground pepper.
Your whole house will smell divine at this point. Shut off the heat and pour yourself another glass of that good red plonk.
Serve in bowls with crusty french bread and a nice fresh green salad on the side.
Feel the love.
Chop up:
Shallots
A few cloves of garlic
An onion
A green or red pepper
Some cremini mushrooms
Soak:
Some dried chantrelles in a cup of water for a half hour. Chop them up, and add the liquid to the stock.
Grate:
Some fontina and some obsenely good parmagiano cheeses....a big handful of each, grated roughly!
Open:
A bottle of white wine that has been sitting around the house because you prefer drinking red.
A bottle of nice shiraz you can drink while cooking the rizotto. This recipe cannot be prepared without drinking wine while cooking.
Heat up:
Some really good soup stock....best is homemade veggie stock, but use what you have.
Chop up:
A couple ripe tomatoes and a few sundried tomatoes. Also chop some fresh basil and thyme, a handful of each.
Saute (on medium heat):
In amazingly good olive oil (we use Salah's gold), the shallots, garlic, onion and pepper, for a few minutes. Add some kosher salt to taste.
Add the mushrooms. Note, the mushrooms should be in larger rather than smaller chunks.
Add:
About 4 cups of arborio or other suitable short grained Italian style rice. You want to make enough for guests + leftovers tomorrow. Add in a ladle full of stock and pour in a few splashes of white wine. Add the herbs. As the rizotto sucks up the liquid, freely add white wine and stock. Add the chantrelles. Add the sun-dried tomatoes. Pour yourself another glass of red, and enjoy a few sips. Keep stirring. Always use a wooden spoon. We do our rizotto in a great big heavy bottom skillet, by the way, and that works out perfectly. Somewhere along the way, remember that you have chopped up some tomatoes and toss them in. Keep adding stock and wine as the rizotto cooks, until the rice is getting tender but still has some body and character about it.
Add:
The cheese. Stir it in. Then add a splash of heavy cream, and stir it around again. Add fresh ground pepper.
Your whole house will smell divine at this point. Shut off the heat and pour yourself another glass of that good red plonk.
Serve in bowls with crusty french bread and a nice fresh green salad on the side.
Feel the love.
Monday, January 2, 2006
Maria's garlic salad dressing
This salad dressing is Ceasar-like, but fixed to be more garlicky:
Recipe for 1 person (yep, that's what you get when you live alone, just multiply it by the number of people you want to serve):
Sun-dried tomatoes: They were too dry (of course), so I put them in a tupperware full of water and left them in the fridge overnight.
Two cloves of garlic finely chopped.
1 anchovy, from a jar
Extra-virgin olive oil
The juice of half a lemon
Pepper
Renee's Ceasar dressing (1 tbsp per person)
Finely chop the sun-dried tomatoes, anchovy and the garlic, cover them with about one teaspoon of olive oil and the juice of half a lemon. Mash them a little bit with your fork.
Mix with the Ceasar dressing.
Use dressing to season pieces of Romain lettuce, some sliced black olives and bacon bits.
You'll have a delicious quasi-ceasar salad, and really garlicky! (that's what I had for dinner last night and, believe me, my mouth remembered it, yaaay).
Recipe for 1 person (yep, that's what you get when you live alone, just multiply it by the number of people you want to serve):
Sun-dried tomatoes: They were too dry (of course), so I put them in a tupperware full of water and left them in the fridge overnight.
Two cloves of garlic finely chopped.
1 anchovy, from a jar
Extra-virgin olive oil
The juice of half a lemon
Pepper
Renee's Ceasar dressing (1 tbsp per person)
Finely chop the sun-dried tomatoes, anchovy and the garlic, cover them with about one teaspoon of olive oil and the juice of half a lemon. Mash them a little bit with your fork.
Mix with the Ceasar dressing.
Use dressing to season pieces of Romain lettuce, some sliced black olives and bacon bits.
You'll have a delicious quasi-ceasar salad, and really garlicky! (that's what I had for dinner last night and, believe me, my mouth remembered it, yaaay).
Wednesday, December 21, 2005
Recipe: Deep-Fried Garlic Cloves and Green Olives
Cathy found this recipe on the NY Times online:
About 36 large garlic cloves, peeled
1 cup pitted green olives, like Manzanilla or Picholine
1 cup flour
1 teaspoon salt, more for sprinkling
½ teaspoon pepper
3 eggs
1 cup fresh bread crumbs or panko
Oil for deep-frying.
1. Put garlic cloves in a saucepan and cover with cold water. Bring to a boil, then reduce heat and simmer 1 minute. Drain and repeat with fresh water. Drain and repeat once more, simmering about 5 minutes or until soft, testing often. Gently lift garlic cloves out of pan and drain on paper towels until cool. Meanwhile, place olives on paper towels to drain.
2. When ready to cook, mix flour, salt and pepper on a plate. In a bowl, beat eggs. Spread bread crumbs on another plate. In a heavy pot, heat 3 inches of oil to 375 degrees: when hot enough, a chunk of bread will fry in 30 seconds.
3. Working in batches, roll garlic cloves and olives in seasoned flour, then in beaten eggs, then in bread crumbs. Repeat process and drop into oil. Cook until golden brown, about 2 minutes. Drain on paper towels and sprinkle lightly with salt. Let oil come back to 375 degrees between batches. Serve immediately.
Yield: Snacks for 6 to 8 people.
About 36 large garlic cloves, peeled
1 cup pitted green olives, like Manzanilla or Picholine
1 cup flour
1 teaspoon salt, more for sprinkling
½ teaspoon pepper
3 eggs
1 cup fresh bread crumbs or panko
Oil for deep-frying.
1. Put garlic cloves in a saucepan and cover with cold water. Bring to a boil, then reduce heat and simmer 1 minute. Drain and repeat with fresh water. Drain and repeat once more, simmering about 5 minutes or until soft, testing often. Gently lift garlic cloves out of pan and drain on paper towels until cool. Meanwhile, place olives on paper towels to drain.
2. When ready to cook, mix flour, salt and pepper on a plate. In a bowl, beat eggs. Spread bread crumbs on another plate. In a heavy pot, heat 3 inches of oil to 375 degrees: when hot enough, a chunk of bread will fry in 30 seconds.
3. Working in batches, roll garlic cloves and olives in seasoned flour, then in beaten eggs, then in bread crumbs. Repeat process and drop into oil. Cook until golden brown, about 2 minutes. Drain on paper towels and sprinkle lightly with salt. Let oil come back to 375 degrees between batches. Serve immediately.
Yield: Snacks for 6 to 8 people.
Monday, December 19, 2005
Patychky for Christmas
Mr. Anchovy posted the recipe for patychky. He says it has "unlimited amounts of garlic"... Delicious!
I've posted mother anchovy's recipe for patychky once before, but seeing as I'm making a large batch for Christmas this week, I'm going to post it again for those who are interested. Patychky are also known as 'meat sticks'. They can be made with pork or a combination of pork and beef and veal, or even with chicken, but I usually use pork, and I'm going to show you my way.
Start with an inexpensive pork roast.
Cut it up into cubes that are a little bigger than 1 cubic inch. Some people use smaller chunks but I find the bigger ones are juicier and just perfect.
Chop up an insane amount of garlic - 30 or 40 big cloves is not too much.
Toss the garlic in with the meat.
At this point you have to add some booze. There are a couple schools of thought on this - some folks use sherry - others use beer. I have done both and I believe that nobody will be able to tell you which you used - so I use beer. So, beer and garlic is your basic marinade. Toss it all together, cover and put the whole business in the fridge overnight. In a pinch you can marinate for a couple hours and it will be OK, but I believe the overnight marinade makes them extra yummy.
Break some eggs in a bowl and lightly beat them for a few seconds. In another bowl, toss in some bread crumbs with salt and pepper.
I should have mentioned earlier that you need the right sticks. They have to be sturdy wooden sticks, about 6 inches long. I get mine at Czehowski's at Queensway and Islington in Toronto - just ask for sticks for patychky and they'll know what you want.
Take the meat from the fridge and start skewering the meat cubes on the sticks such that you basically cover the wood. Once you have them all done, dip them in egg and roll them in the breadcrumb mixture.
Meanwhile, add a generous portion of oil to a good skillet and heat it on medium-high. For this, don't use olive oil. It has to be an oil that can handle more heat, like canola or corn oil.
Brown the patychky thoroughly, 4 or 5 at a time.
Meanwhile, take a roaster and line the bottom with sticks of celery. These are to keep the patychky off the bottom of the pan. Preheat your oven to about 350 f.
As you take the patychky out of the skillet, lay them on the celery in the roaster. It's OK to have two or three layers of meat sticks - don't worry about them touching one another.
Bake the whole business for 45 minutes to an hour. After 45 minutes, take one out and eat it. Then put them back in for a few minutes, before testing a second one. This is chef's privilage.
I have never met anyone who likes meat who does not go crazy for these things. My mom used to make them for every big holiday occasion - and later I found out that Tuffy's mom did too - basically the same approach. I learned about using the celery from Tuffy's mom - it's an excellent innovation.
Patychky are great right out of the oven, cold for breakfast, re-heated in a toaster over, or even zapped up next day in a microwave, if you must use one.
If any of you make these, please report back and let me know how you liked them.
I've posted mother anchovy's recipe for patychky once before, but seeing as I'm making a large batch for Christmas this week, I'm going to post it again for those who are interested. Patychky are also known as 'meat sticks'. They can be made with pork or a combination of pork and beef and veal, or even with chicken, but I usually use pork, and I'm going to show you my way.
Start with an inexpensive pork roast.
Cut it up into cubes that are a little bigger than 1 cubic inch. Some people use smaller chunks but I find the bigger ones are juicier and just perfect.
Chop up an insane amount of garlic - 30 or 40 big cloves is not too much.
Toss the garlic in with the meat.
At this point you have to add some booze. There are a couple schools of thought on this - some folks use sherry - others use beer. I have done both and I believe that nobody will be able to tell you which you used - so I use beer. So, beer and garlic is your basic marinade. Toss it all together, cover and put the whole business in the fridge overnight. In a pinch you can marinate for a couple hours and it will be OK, but I believe the overnight marinade makes them extra yummy.
Break some eggs in a bowl and lightly beat them for a few seconds. In another bowl, toss in some bread crumbs with salt and pepper.
I should have mentioned earlier that you need the right sticks. They have to be sturdy wooden sticks, about 6 inches long. I get mine at Czehowski's at Queensway and Islington in Toronto - just ask for sticks for patychky and they'll know what you want.
Take the meat from the fridge and start skewering the meat cubes on the sticks such that you basically cover the wood. Once you have them all done, dip them in egg and roll them in the breadcrumb mixture.
Meanwhile, add a generous portion of oil to a good skillet and heat it on medium-high. For this, don't use olive oil. It has to be an oil that can handle more heat, like canola or corn oil.
Brown the patychky thoroughly, 4 or 5 at a time.
Meanwhile, take a roaster and line the bottom with sticks of celery. These are to keep the patychky off the bottom of the pan. Preheat your oven to about 350 f.
As you take the patychky out of the skillet, lay them on the celery in the roaster. It's OK to have two or three layers of meat sticks - don't worry about them touching one another.
Bake the whole business for 45 minutes to an hour. After 45 minutes, take one out and eat it. Then put them back in for a few minutes, before testing a second one. This is chef's privilage.
I have never met anyone who likes meat who does not go crazy for these things. My mom used to make them for every big holiday occasion - and later I found out that Tuffy's mom did too - basically the same approach. I learned about using the celery from Tuffy's mom - it's an excellent innovation.
Patychky are great right out of the oven, cold for breakfast, re-heated in a toaster over, or even zapped up next day in a microwave, if you must use one.
If any of you make these, please report back and let me know how you liked them.
Monday, December 12, 2005
Tuffy's roast potatoes
Mister Anchovy writes:
Here's the recipe:
Cut up a bunch of potatoes slightly bigger than French Fry size - Yukon Gold work really nicely for this. Cut up an onion, and a several whole cloves of garlic. Put it all in a big bowl. Add about a teaspoon of smoked Spanish paprika, salt, pepper, and a little savory. You can use any spice mix you like, but the smoked paprika is at the heart of this. Add enough obsenely good olive oil so that when you toss the mixture together, the potatoes are lightly coated with the olive oil. Line a roasting pan with parchment paper and spread the mixture across the pan. Roast at about 350 until the potatoes are cooked. Then turn the oven to broil and blast the potato mixture for two or three minutes. Put the cooked potatoes into a bowl - add some kosher salt and toss it. These taste great with almost anything. Why not try it with Great White Bear's brisket recipe!.
There are three keys to this recipe - plenty of whole garlic cloves, really excellent olive oil, and smoked Spanish paprika. Tuffy made some tonight and they were fantastic.
Here's the recipe:
Cut up a bunch of potatoes slightly bigger than French Fry size - Yukon Gold work really nicely for this. Cut up an onion, and a several whole cloves of garlic. Put it all in a big bowl. Add about a teaspoon of smoked Spanish paprika, salt, pepper, and a little savory. You can use any spice mix you like, but the smoked paprika is at the heart of this. Add enough obsenely good olive oil so that when you toss the mixture together, the potatoes are lightly coated with the olive oil. Line a roasting pan with parchment paper and spread the mixture across the pan. Roast at about 350 until the potatoes are cooked. Then turn the oven to broil and blast the potato mixture for two or three minutes. Put the cooked potatoes into a bowl - add some kosher salt and toss it. These taste great with almost anything. Why not try it with Great White Bear's brisket recipe!.
Thursday, December 8, 2005
Garlic mustard
Julia has a great post about mustard at the St. Lawrence Market. The guy even has garlic mustard. I personally haven't tried it but I've tried a couple of others that he sells. They're really good.
Go visit her blog for the link.
Go visit her blog for the link.
Sunday, December 4, 2005
Garlic squid
Recipe sent by Fearless:
1 lb. squid, cleaned & cut into 1 inch rounds
2 tbl. minced onion
2 tbl. oil
6 cloves garlic, diced
1 tsp. pepper
1/2 tsp. salt
1 tbl. lime juice
Pat dry squid.
Heat oil in pan, add garlic and onion until soft over medium.
Heat, turn to high, add squid until it starts to lose its translucence. Add salt and pepper and cook squiduntil done.
Remove from heat, sprinkle lime juice and serve over rice.
1 lb. squid, cleaned & cut into 1 inch rounds
2 tbl. minced onion
2 tbl. oil
6 cloves garlic, diced
1 tsp. pepper
1/2 tsp. salt
1 tbl. lime juice
Pat dry squid.
Heat oil in pan, add garlic and onion until soft over medium.
Heat, turn to high, add squid until it starts to lose its translucence. Add salt and pepper and cook squiduntil done.
Remove from heat, sprinkle lime juice and serve over rice.
Wednesday, November 30, 2005
Garlic shrimp
The CookingDiva posted the recipe for Garlic shrimp:
Ingredients:
* 2 pounds large shrimp, cleaned, shelled
* 15 cloves garlic, peeled (add more if you want)
* 1/2 cup green bell pepper, stems and seeds removed, and chopped
* 1 cup onion, chopped
* 3 1/2 Tablespoons fresh cilantro or parsley, minced
* 1 1/2 Tablespoons freshly squeezed lime juice
* 8 Tablespoons hot melted butter or olive oil
* Salt and freshly ground black pepper to taste
Directions:
1. Place the garlic in a small sauce pot with enough water to cover them. Bring the water to a boil, and then lower to a simmer until the garlic cloves are soft (about 20 minutes). Drain the water and refresh the garlic cloves with cold water. Allow to cool. Mince the cooked garlic.
2. Melt butter in a sautee pan, add the chopped onion and cook until translucent, then blend in the chopped bell pepper and cook for one more minute. Add the shrimp, lime juice, cilantro (or parsley), chopped cooked garlic, and cook until the shrimp is done (about 3-5 minutes) or until pink. PLEASE, Do not over cook! Rubbery shrimp is a gastronomical aberration! :(
3. Transfer the shrimp to a platter and drizzle the garlic butter over it.
Serve with steamed white rice and lime wedges.
Yield: 5-6 servings
Ingredients:
* 2 pounds large shrimp, cleaned, shelled
* 15 cloves garlic, peeled (add more if you want)
* 1/2 cup green bell pepper, stems and seeds removed, and chopped
* 1 cup onion, chopped
* 3 1/2 Tablespoons fresh cilantro or parsley, minced
* 1 1/2 Tablespoons freshly squeezed lime juice
* 8 Tablespoons hot melted butter or olive oil
* Salt and freshly ground black pepper to taste
Directions:
1. Place the garlic in a small sauce pot with enough water to cover them. Bring the water to a boil, and then lower to a simmer until the garlic cloves are soft (about 20 minutes). Drain the water and refresh the garlic cloves with cold water. Allow to cool. Mince the cooked garlic.
2. Melt butter in a sautee pan, add the chopped onion and cook until translucent, then blend in the chopped bell pepper and cook for one more minute. Add the shrimp, lime juice, cilantro (or parsley), chopped cooked garlic, and cook until the shrimp is done (about 3-5 minutes) or until pink. PLEASE, Do not over cook! Rubbery shrimp is a gastronomical aberration! :(
3. Transfer the shrimp to a platter and drizzle the garlic butter over it.
Serve with steamed white rice and lime wedges.
Yield: 5-6 servings
Thursday, November 24, 2005
Garlic-lemon salmon
I really enjoy salmon, it's easy and fast to cook and it's healthy.
Garlic lemon salmon
(good for 2 people)
1 pound of salmon fillet
3 cloves chopped garlic (in slivers, if possible)
1 lemon, sliced
lemon pepper seasoning
garlic salt
Place salmon in aluminium foil, cover with garlic slivers and slices of lemon. Season with a tiny bit of lemmon pepper and garlic salt. Wrap it in the foil.
Bake for 20 minutes at 450 F.
Enjoy!
I like accompanying salmon with plain white rice (or Uncle Ben's garlic rice, it turns out good!). Also with some greens like greenbeans or steamed broccoli.
Garlic lemon salmon
(good for 2 people)
1 pound of salmon fillet
3 cloves chopped garlic (in slivers, if possible)
1 lemon, sliced
lemon pepper seasoning
garlic salt
Place salmon in aluminium foil, cover with garlic slivers and slices of lemon. Season with a tiny bit of lemmon pepper and garlic salt. Wrap it in the foil.
Bake for 20 minutes at 450 F.
Enjoy!
I like accompanying salmon with plain white rice (or Uncle Ben's garlic rice, it turns out good!). Also with some greens like greenbeans or steamed broccoli.
Monday, November 21, 2005
Lemon Dressing
Recipe sent by JadeMarie:
This is mainly a salad dressing, but you can use it as a marinade too.
LEMON DRESSING
1/4 cup olive oil
2 Tbsp. fresh lemon juice
1/4 tsp. oregano
1 clove garlic, smashed**
Salt, pepper
Combine all ingredients in a lidded jar and shake well. Let stand at least 15 to 20 minutes to combine flavors. Store leftover dressing in refrigerator. Bring to room temperature before using.
By Jane Snow
www.ohio.com
**JadeMarie's note--1 clove of garlic is a modest amount. I prefer 3 or 4 cloves, if they are small. It really depends on the size of the garlic clove. I love this dressing! The flavour reminds me of the taste of garlic-stuffed olives.
This is mainly a salad dressing, but you can use it as a marinade too.
LEMON DRESSING
1/4 cup olive oil
2 Tbsp. fresh lemon juice
1/4 tsp. oregano
1 clove garlic, smashed**
Salt, pepper
Combine all ingredients in a lidded jar and shake well. Let stand at least 15 to 20 minutes to combine flavors. Store leftover dressing in refrigerator. Bring to room temperature before using.
By Jane Snow
www.ohio.com
**JadeMarie's note--1 clove of garlic is a modest amount. I prefer 3 or 4 cloves, if they are small. It really depends on the size of the garlic clove. I love this dressing! The flavour reminds me of the taste of garlic-stuffed olives.
Friday, November 18, 2005
Some Indian recipes that include garlic
Recipe sent by Sub-Rosa:
Gujerati Green Beans
Here’s what you need:
1 pound fresh green beans
1 good sized shallot, peeled and coarsely chopped
4 Tbsp. vegetable oil
1 Tbsp. whole black mustard seeds
1 tsp. ground cumin seeds, toasted
2 cloves garlic, peeled and minced
½ - 1 diced jalapeño pepper
salt
black pepper
Here’s what you do:
1. Lay a row of beans. Trim the ends. Do them all that way.
2. Blanch the beans by dropping them into a pot of boiling water and boiling rapidly for 3 to 4 minutes or until they are just tender. Drain immediately in a colander and rinse under cold running water. Set aside.
3. Heat the oil in a large fry pan over a medium heat. Sautee the shallots - when hot, put in the mustard seeds. As soon as they begin to pop (watch out, those mustard seeds really do jump out), put in the garlic and the jalapeño. Stir the garlic pieces around until they turn light brown. Work fast - you don’t want to burn these ingredients.
4. Put in the green beans, salt and sugar. Stir to mix. Turn the heat to medium-low. Add 2 Tbsp. water. Toss in the ground cumin (and the coconut if you are adding this ingredient) and stir. Cover and cook the beans for 7 to 8 minutes or until they have absorbed the flavor of the spices. Add the black pepper to taste, mix and serve.
Inspired by Madhur Jaffrey (but then, she always inspires us)
Gujerati Green Beans
Here’s what you need:
1 pound fresh green beans
1 good sized shallot, peeled and coarsely chopped
4 Tbsp. vegetable oil
1 Tbsp. whole black mustard seeds
1 tsp. ground cumin seeds, toasted
2 cloves garlic, peeled and minced
½ - 1 diced jalapeño pepper
salt
black pepper
Here’s what you do:
1. Lay a row of beans. Trim the ends. Do them all that way.
2. Blanch the beans by dropping them into a pot of boiling water and boiling rapidly for 3 to 4 minutes or until they are just tender. Drain immediately in a colander and rinse under cold running water. Set aside.
3. Heat the oil in a large fry pan over a medium heat. Sautee the shallots - when hot, put in the mustard seeds. As soon as they begin to pop (watch out, those mustard seeds really do jump out), put in the garlic and the jalapeño. Stir the garlic pieces around until they turn light brown. Work fast - you don’t want to burn these ingredients.
4. Put in the green beans, salt and sugar. Stir to mix. Turn the heat to medium-low. Add 2 Tbsp. water. Toss in the ground cumin (and the coconut if you are adding this ingredient) and stir. Cover and cook the beans for 7 to 8 minutes or until they have absorbed the flavor of the spices. Add the black pepper to taste, mix and serve.
Inspired by Madhur Jaffrey (but then, she always inspires us)
Sunday, November 13, 2005
Turkey sausage recipe
Coastalcutie sent her recipe for turkey sausage:
This recipe is for sausage that is easy to make, and has much less fat than regular sausage, and no preservatives! Spices can be adjusted to taste.
1.25 pounds ground turkey
1 small onion, minced
1 Tbls. chopped fresh parsley
3 lg cloves garlic, minced
1 tsp. salt
1 tsp. fennel seed
2 tsp. McCormic/Schilling turkey rub (sold in jars)
1/4 tsp. pepper
Mix all ingredients together well, and for best results, let refrigerate overnight for the best flavor. Use like breakfast sausage, or in place of Italian sausage in recipes. It also makes great meatballs.
This recipe is for sausage that is easy to make, and has much less fat than regular sausage, and no preservatives! Spices can be adjusted to taste.
1.25 pounds ground turkey
1 small onion, minced
1 Tbls. chopped fresh parsley
3 lg cloves garlic, minced
1 tsp. salt
1 tsp. fennel seed
2 tsp. McCormic/Schilling turkey rub (sold in jars)
1/4 tsp. pepper
Mix all ingredients together well, and for best results, let refrigerate overnight for the best flavor. Use like breakfast sausage, or in place of Italian sausage in recipes. It also makes great meatballs.
Thursday, November 10, 2005
Tomato Marinade
Sent by Fearless:
In season, not a lot of garlic, but none better.
Uses: by itself {healthy} or in addition to most recipes, like hamburgerss needing something new.
3 tomatoes sliced however you like them.
Add marinade:
1/3 c. salad oil
1/8 c. wine vinegar
1/8 c. parsley or cilantro
1/8 c. diced onion
2 garlic cloves, diced or minced
1/2 tsp each of salt, dill weed, and basil
1/8 tsp pepper
refrigerate 2 hours, ENJOY
In season, not a lot of garlic, but none better.
Uses: by itself {healthy} or in addition to most recipes, like hamburgerss needing something new.
3 tomatoes sliced however you like them.
Add marinade:
1/3 c. salad oil
1/8 c. wine vinegar
1/8 c. parsley or cilantro
1/8 c. diced onion
2 garlic cloves, diced or minced
1/2 tsp each of salt, dill weed, and basil
1/8 tsp pepper
refrigerate 2 hours, ENJOY
Monday, November 7, 2005
Garlic Health Benefits
JadeMarie found the link for Garlic for Health:
Garlic health benefits and medicinal properties have long been known. Garlic has long been considered a herbal "wonder drug", with a reputation for preventing everything from the common cold and flu to the Plague! It has been used extensively in herbal medicine (phytotherapy, sometimes spelt phitotherapy). Raw garlic is used by some to treat the symptoms of acne and there is some evidence that it can assist in managing high cholesterol levels. It can even be effective as a natural mosquito repellent...... [LINK]
Garlic health benefits and medicinal properties have long been known. Garlic has long been considered a herbal "wonder drug", with a reputation for preventing everything from the common cold and flu to the Plague! It has been used extensively in herbal medicine (phytotherapy, sometimes spelt phitotherapy). Raw garlic is used by some to treat the symptoms of acne and there is some evidence that it can assist in managing high cholesterol levels. It can even be effective as a natural mosquito repellent...... [LINK]
Tuesday, November 1, 2005
Olive roasted head of garlic
The Cooking Diva sent an email to the link for her olive roasted head of garlic. You can find it here (and it has a nice picture on it).
Here is a copy of the recipe and of her post:
Garlic joy..., that is what I feel right now! Oh my garlic..., Oh my delicious roasted garlic... There is nothing better than a fresh roasted head of garlic to have with a still warm loaf of French bread. And I say loaf, because when you start would be very difficult to stop! :)
Now, I am going to present you a list of reasons why this recipe is a MUST for your life:
1. It is so easy to prepare, always a good thing to have in the fridge ready. A delicacy like this is very expensive to purchase already prepared..., just take a look at the gourmet shop near you, or at the supermarket..., and you will see what I mean.
2. The health benefits of the garlic are widely known, including the fact that is considered a mosquito repellent (that in my case would be of great help, because they LOVE me!). It is believed that if you eat a large amount of garlic then it actually seeps out through the pores of your skin. Any intelligent mosquito which finds you will think twice before taking a bite. You can read more on the health benefits of eating garlic HERE.
3. There are so many scrumptious recipes you could prepare with roasted garlic, why do not you try now?
The Ingredients:
4 heads of garlic
2 tablespoon olive oil
1/2 teaspoon salt
1/4 teaspoon black pepper
1/4 cup water
Directions:
1. Pre-heat the oven to 500 F. Trim the stems of the garlic heads by 1/2-inch.
2. Place the garlic heads, cut side up, in a small baking dish and drizzle them with olive oil and season with salt and pepper. Then add the water to the baking dish and bake in the preheated oven for 30 minutes, or until the garlic is golden brown on top.
3. Remove the baking dish from the oven and let the garlic cool completely. Then, squeeze carefully the garlic out from the skins.
4. Serve with slices of French bread and garnish garlic with little olive oil and parsley on top.
Enjoy! Melissa
Here is a copy of the recipe and of her post:
Garlic joy..., that is what I feel right now! Oh my garlic..., Oh my delicious roasted garlic... There is nothing better than a fresh roasted head of garlic to have with a still warm loaf of French bread. And I say loaf, because when you start would be very difficult to stop! :)
Now, I am going to present you a list of reasons why this recipe is a MUST for your life:
1. It is so easy to prepare, always a good thing to have in the fridge ready. A delicacy like this is very expensive to purchase already prepared..., just take a look at the gourmet shop near you, or at the supermarket..., and you will see what I mean.
2. The health benefits of the garlic are widely known, including the fact that is considered a mosquito repellent (that in my case would be of great help, because they LOVE me!). It is believed that if you eat a large amount of garlic then it actually seeps out through the pores of your skin. Any intelligent mosquito which finds you will think twice before taking a bite. You can read more on the health benefits of eating garlic HERE.
3. There are so many scrumptious recipes you could prepare with roasted garlic, why do not you try now?
The Ingredients:
4 heads of garlic
2 tablespoon olive oil
1/2 teaspoon salt
1/4 teaspoon black pepper
1/4 cup water
Directions:
1. Pre-heat the oven to 500 F. Trim the stems of the garlic heads by 1/2-inch.
2. Place the garlic heads, cut side up, in a small baking dish and drizzle them with olive oil and season with salt and pepper. Then add the water to the baking dish and bake in the preheated oven for 30 minutes, or until the garlic is golden brown on top.
3. Remove the baking dish from the oven and let the garlic cool completely. Then, squeeze carefully the garlic out from the skins.
4. Serve with slices of French bread and garnish garlic with little olive oil and parsley on top.
Enjoy! Melissa
Subscribe to:
Posts (Atom)