Cathy found this recipe on the NY Times online:
About 36 large garlic cloves, peeled
1 cup pitted green olives, like Manzanilla or Picholine
1 cup flour
1 teaspoon salt, more for sprinkling
½ teaspoon pepper
3 eggs
1 cup fresh bread crumbs or panko
Oil for deep-frying.
1. Put garlic cloves in a saucepan and cover with cold water. Bring to a boil, then reduce heat and simmer 1 minute. Drain and repeat with fresh water. Drain and repeat once more, simmering about 5 minutes or until soft, testing often. Gently lift garlic cloves out of pan and drain on paper towels until cool. Meanwhile, place olives on paper towels to drain.
2. When ready to cook, mix flour, salt and pepper on a plate. In a bowl, beat eggs. Spread bread crumbs on another plate. In a heavy pot, heat 3 inches of oil to 375 degrees: when hot enough, a chunk of bread will fry in 30 seconds.
3. Working in batches, roll garlic cloves and olives in seasoned flour, then in beaten eggs, then in bread crumbs. Repeat process and drop into oil. Cook until golden brown, about 2 minutes. Drain on paper towels and sprinkle lightly with salt. Let oil come back to 375 degrees between batches. Serve immediately.
Yield: Snacks for 6 to 8 people.
Wednesday, December 21, 2005


Monday, December 19, 2005
Patychky for Christmas
Mr. Anchovy posted the recipe for patychky. He says it has "unlimited amounts of garlic"... Delicious!
I've posted mother anchovy's recipe for patychky once before, but seeing as I'm making a large batch for Christmas this week, I'm going to post it again for those who are interested. Patychky are also known as 'meat sticks'. They can be made with pork or a combination of pork and beef and veal, or even with chicken, but I usually use pork, and I'm going to show you my way.
Start with an inexpensive pork roast.
Cut it up into cubes that are a little bigger than 1 cubic inch. Some people use smaller chunks but I find the bigger ones are juicier and just perfect.
Chop up an insane amount of garlic - 30 or 40 big cloves is not too much.
Toss the garlic in with the meat.
At this point you have to add some booze. There are a couple schools of thought on this - some folks use sherry - others use beer. I have done both and I believe that nobody will be able to tell you which you used - so I use beer. So, beer and garlic is your basic marinade. Toss it all together, cover and put the whole business in the fridge overnight. In a pinch you can marinate for a couple hours and it will be OK, but I believe the overnight marinade makes them extra yummy.
Break some eggs in a bowl and lightly beat them for a few seconds. In another bowl, toss in some bread crumbs with salt and pepper.
I should have mentioned earlier that you need the right sticks. They have to be sturdy wooden sticks, about 6 inches long. I get mine at Czehowski's at Queensway and Islington in Toronto - just ask for sticks for patychky and they'll know what you want.
Take the meat from the fridge and start skewering the meat cubes on the sticks such that you basically cover the wood. Once you have them all done, dip them in egg and roll them in the breadcrumb mixture.
Meanwhile, add a generous portion of oil to a good skillet and heat it on medium-high. For this, don't use olive oil. It has to be an oil that can handle more heat, like canola or corn oil.
Brown the patychky thoroughly, 4 or 5 at a time.
Meanwhile, take a roaster and line the bottom with sticks of celery. These are to keep the patychky off the bottom of the pan. Preheat your oven to about 350 f.
As you take the patychky out of the skillet, lay them on the celery in the roaster. It's OK to have two or three layers of meat sticks - don't worry about them touching one another.
Bake the whole business for 45 minutes to an hour. After 45 minutes, take one out and eat it. Then put them back in for a few minutes, before testing a second one. This is chef's privilage.
I have never met anyone who likes meat who does not go crazy for these things. My mom used to make them for every big holiday occasion - and later I found out that Tuffy's mom did too - basically the same approach. I learned about using the celery from Tuffy's mom - it's an excellent innovation.
Patychky are great right out of the oven, cold for breakfast, re-heated in a toaster over, or even zapped up next day in a microwave, if you must use one.
If any of you make these, please report back and let me know how you liked them.
I've posted mother anchovy's recipe for patychky once before, but seeing as I'm making a large batch for Christmas this week, I'm going to post it again for those who are interested. Patychky are also known as 'meat sticks'. They can be made with pork or a combination of pork and beef and veal, or even with chicken, but I usually use pork, and I'm going to show you my way.
Start with an inexpensive pork roast.
Cut it up into cubes that are a little bigger than 1 cubic inch. Some people use smaller chunks but I find the bigger ones are juicier and just perfect.
Chop up an insane amount of garlic - 30 or 40 big cloves is not too much.
Toss the garlic in with the meat.
At this point you have to add some booze. There are a couple schools of thought on this - some folks use sherry - others use beer. I have done both and I believe that nobody will be able to tell you which you used - so I use beer. So, beer and garlic is your basic marinade. Toss it all together, cover and put the whole business in the fridge overnight. In a pinch you can marinate for a couple hours and it will be OK, but I believe the overnight marinade makes them extra yummy.
Break some eggs in a bowl and lightly beat them for a few seconds. In another bowl, toss in some bread crumbs with salt and pepper.
I should have mentioned earlier that you need the right sticks. They have to be sturdy wooden sticks, about 6 inches long. I get mine at Czehowski's at Queensway and Islington in Toronto - just ask for sticks for patychky and they'll know what you want.
Take the meat from the fridge and start skewering the meat cubes on the sticks such that you basically cover the wood. Once you have them all done, dip them in egg and roll them in the breadcrumb mixture.
Meanwhile, add a generous portion of oil to a good skillet and heat it on medium-high. For this, don't use olive oil. It has to be an oil that can handle more heat, like canola or corn oil.
Brown the patychky thoroughly, 4 or 5 at a time.
Meanwhile, take a roaster and line the bottom with sticks of celery. These are to keep the patychky off the bottom of the pan. Preheat your oven to about 350 f.
As you take the patychky out of the skillet, lay them on the celery in the roaster. It's OK to have two or three layers of meat sticks - don't worry about them touching one another.
Bake the whole business for 45 minutes to an hour. After 45 minutes, take one out and eat it. Then put them back in for a few minutes, before testing a second one. This is chef's privilage.
I have never met anyone who likes meat who does not go crazy for these things. My mom used to make them for every big holiday occasion - and later I found out that Tuffy's mom did too - basically the same approach. I learned about using the celery from Tuffy's mom - it's an excellent innovation.
Patychky are great right out of the oven, cold for breakfast, re-heated in a toaster over, or even zapped up next day in a microwave, if you must use one.
If any of you make these, please report back and let me know how you liked them.
Monday, December 12, 2005
Tuffy's roast potatoes
Mister Anchovy writes:
Here's the recipe:
Cut up a bunch of potatoes slightly bigger than French Fry size - Yukon Gold work really nicely for this. Cut up an onion, and a several whole cloves of garlic. Put it all in a big bowl. Add about a teaspoon of smoked Spanish paprika, salt, pepper, and a little savory. You can use any spice mix you like, but the smoked paprika is at the heart of this. Add enough obsenely good olive oil so that when you toss the mixture together, the potatoes are lightly coated with the olive oil. Line a roasting pan with parchment paper and spread the mixture across the pan. Roast at about 350 until the potatoes are cooked. Then turn the oven to broil and blast the potato mixture for two or three minutes. Put the cooked potatoes into a bowl - add some kosher salt and toss it. These taste great with almost anything. Why not try it with Great White Bear's brisket recipe!.
There are three keys to this recipe - plenty of whole garlic cloves, really excellent olive oil, and smoked Spanish paprika. Tuffy made some tonight and they were fantastic.
Here's the recipe:
Cut up a bunch of potatoes slightly bigger than French Fry size - Yukon Gold work really nicely for this. Cut up an onion, and a several whole cloves of garlic. Put it all in a big bowl. Add about a teaspoon of smoked Spanish paprika, salt, pepper, and a little savory. You can use any spice mix you like, but the smoked paprika is at the heart of this. Add enough obsenely good olive oil so that when you toss the mixture together, the potatoes are lightly coated with the olive oil. Line a roasting pan with parchment paper and spread the mixture across the pan. Roast at about 350 until the potatoes are cooked. Then turn the oven to broil and blast the potato mixture for two or three minutes. Put the cooked potatoes into a bowl - add some kosher salt and toss it. These taste great with almost anything. Why not try it with Great White Bear's brisket recipe!.
Thursday, December 8, 2005
Garlic mustard
Julia has a great post about mustard at the St. Lawrence Market. The guy even has garlic mustard. I personally haven't tried it but I've tried a couple of others that he sells. They're really good.
Go visit her blog for the link.
Go visit her blog for the link.
Sunday, December 4, 2005
Garlic squid
Recipe sent by Fearless:
1 lb. squid, cleaned & cut into 1 inch rounds
2 tbl. minced onion
2 tbl. oil
6 cloves garlic, diced
1 tsp. pepper
1/2 tsp. salt
1 tbl. lime juice
Pat dry squid.
Heat oil in pan, add garlic and onion until soft over medium.
Heat, turn to high, add squid until it starts to lose its translucence. Add salt and pepper and cook squiduntil done.
Remove from heat, sprinkle lime juice and serve over rice.
1 lb. squid, cleaned & cut into 1 inch rounds
2 tbl. minced onion
2 tbl. oil
6 cloves garlic, diced
1 tsp. pepper
1/2 tsp. salt
1 tbl. lime juice
Pat dry squid.
Heat oil in pan, add garlic and onion until soft over medium.
Heat, turn to high, add squid until it starts to lose its translucence. Add salt and pepper and cook squiduntil done.
Remove from heat, sprinkle lime juice and serve over rice.
Wednesday, November 30, 2005
Garlic shrimp
The CookingDiva posted the recipe for Garlic shrimp:
Ingredients:
* 2 pounds large shrimp, cleaned, shelled
* 15 cloves garlic, peeled (add more if you want)
* 1/2 cup green bell pepper, stems and seeds removed, and chopped
* 1 cup onion, chopped
* 3 1/2 Tablespoons fresh cilantro or parsley, minced
* 1 1/2 Tablespoons freshly squeezed lime juice
* 8 Tablespoons hot melted butter or olive oil
* Salt and freshly ground black pepper to taste
Directions:
1. Place the garlic in a small sauce pot with enough water to cover them. Bring the water to a boil, and then lower to a simmer until the garlic cloves are soft (about 20 minutes). Drain the water and refresh the garlic cloves with cold water. Allow to cool. Mince the cooked garlic.
2. Melt butter in a sautee pan, add the chopped onion and cook until translucent, then blend in the chopped bell pepper and cook for one more minute. Add the shrimp, lime juice, cilantro (or parsley), chopped cooked garlic, and cook until the shrimp is done (about 3-5 minutes) or until pink. PLEASE, Do not over cook! Rubbery shrimp is a gastronomical aberration! :(
3. Transfer the shrimp to a platter and drizzle the garlic butter over it.
Serve with steamed white rice and lime wedges.
Yield: 5-6 servings
Ingredients:
* 2 pounds large shrimp, cleaned, shelled
* 15 cloves garlic, peeled (add more if you want)
* 1/2 cup green bell pepper, stems and seeds removed, and chopped
* 1 cup onion, chopped
* 3 1/2 Tablespoons fresh cilantro or parsley, minced
* 1 1/2 Tablespoons freshly squeezed lime juice
* 8 Tablespoons hot melted butter or olive oil
* Salt and freshly ground black pepper to taste
Directions:
1. Place the garlic in a small sauce pot with enough water to cover them. Bring the water to a boil, and then lower to a simmer until the garlic cloves are soft (about 20 minutes). Drain the water and refresh the garlic cloves with cold water. Allow to cool. Mince the cooked garlic.
2. Melt butter in a sautee pan, add the chopped onion and cook until translucent, then blend in the chopped bell pepper and cook for one more minute. Add the shrimp, lime juice, cilantro (or parsley), chopped cooked garlic, and cook until the shrimp is done (about 3-5 minutes) or until pink. PLEASE, Do not over cook! Rubbery shrimp is a gastronomical aberration! :(
3. Transfer the shrimp to a platter and drizzle the garlic butter over it.
Serve with steamed white rice and lime wedges.
Yield: 5-6 servings
Thursday, November 24, 2005
Garlic-lemon salmon
I really enjoy salmon, it's easy and fast to cook and it's healthy.
Garlic lemon salmon
(good for 2 people)
1 pound of salmon fillet
3 cloves chopped garlic (in slivers, if possible)
1 lemon, sliced
lemon pepper seasoning
garlic salt
Place salmon in aluminium foil, cover with garlic slivers and slices of lemon. Season with a tiny bit of lemmon pepper and garlic salt. Wrap it in the foil.
Bake for 20 minutes at 450 F.
Enjoy!
I like accompanying salmon with plain white rice (or Uncle Ben's garlic rice, it turns out good!). Also with some greens like greenbeans or steamed broccoli.
Garlic lemon salmon
(good for 2 people)
1 pound of salmon fillet
3 cloves chopped garlic (in slivers, if possible)
1 lemon, sliced
lemon pepper seasoning
garlic salt
Place salmon in aluminium foil, cover with garlic slivers and slices of lemon. Season with a tiny bit of lemmon pepper and garlic salt. Wrap it in the foil.
Bake for 20 minutes at 450 F.
Enjoy!
I like accompanying salmon with plain white rice (or Uncle Ben's garlic rice, it turns out good!). Also with some greens like greenbeans or steamed broccoli.
Monday, November 21, 2005
Lemon Dressing
Recipe sent by JadeMarie:
This is mainly a salad dressing, but you can use it as a marinade too.
LEMON DRESSING
1/4 cup olive oil
2 Tbsp. fresh lemon juice
1/4 tsp. oregano
1 clove garlic, smashed**
Salt, pepper
Combine all ingredients in a lidded jar and shake well. Let stand at least 15 to 20 minutes to combine flavors. Store leftover dressing in refrigerator. Bring to room temperature before using.
By Jane Snow
www.ohio.com
**JadeMarie's note--1 clove of garlic is a modest amount. I prefer 3 or 4 cloves, if they are small. It really depends on the size of the garlic clove. I love this dressing! The flavour reminds me of the taste of garlic-stuffed olives.
This is mainly a salad dressing, but you can use it as a marinade too.
LEMON DRESSING
1/4 cup olive oil
2 Tbsp. fresh lemon juice
1/4 tsp. oregano
1 clove garlic, smashed**
Salt, pepper
Combine all ingredients in a lidded jar and shake well. Let stand at least 15 to 20 minutes to combine flavors. Store leftover dressing in refrigerator. Bring to room temperature before using.
By Jane Snow
www.ohio.com
**JadeMarie's note--1 clove of garlic is a modest amount. I prefer 3 or 4 cloves, if they are small. It really depends on the size of the garlic clove. I love this dressing! The flavour reminds me of the taste of garlic-stuffed olives.
Friday, November 18, 2005
Some Indian recipes that include garlic
Recipe sent by Sub-Rosa:
Gujerati Green Beans
Here’s what you need:
1 pound fresh green beans
1 good sized shallot, peeled and coarsely chopped
4 Tbsp. vegetable oil
1 Tbsp. whole black mustard seeds
1 tsp. ground cumin seeds, toasted
2 cloves garlic, peeled and minced
½ - 1 diced jalapeño pepper
salt
black pepper
Here’s what you do:
1. Lay a row of beans. Trim the ends. Do them all that way.
2. Blanch the beans by dropping them into a pot of boiling water and boiling rapidly for 3 to 4 minutes or until they are just tender. Drain immediately in a colander and rinse under cold running water. Set aside.
3. Heat the oil in a large fry pan over a medium heat. Sautee the shallots - when hot, put in the mustard seeds. As soon as they begin to pop (watch out, those mustard seeds really do jump out), put in the garlic and the jalapeño. Stir the garlic pieces around until they turn light brown. Work fast - you don’t want to burn these ingredients.
4. Put in the green beans, salt and sugar. Stir to mix. Turn the heat to medium-low. Add 2 Tbsp. water. Toss in the ground cumin (and the coconut if you are adding this ingredient) and stir. Cover and cook the beans for 7 to 8 minutes or until they have absorbed the flavor of the spices. Add the black pepper to taste, mix and serve.
Inspired by Madhur Jaffrey (but then, she always inspires us)
Gujerati Green Beans
Here’s what you need:
1 pound fresh green beans
1 good sized shallot, peeled and coarsely chopped
4 Tbsp. vegetable oil
1 Tbsp. whole black mustard seeds
1 tsp. ground cumin seeds, toasted
2 cloves garlic, peeled and minced
½ - 1 diced jalapeño pepper
salt
black pepper
Here’s what you do:
1. Lay a row of beans. Trim the ends. Do them all that way.
2. Blanch the beans by dropping them into a pot of boiling water and boiling rapidly for 3 to 4 minutes or until they are just tender. Drain immediately in a colander and rinse under cold running water. Set aside.
3. Heat the oil in a large fry pan over a medium heat. Sautee the shallots - when hot, put in the mustard seeds. As soon as they begin to pop (watch out, those mustard seeds really do jump out), put in the garlic and the jalapeño. Stir the garlic pieces around until they turn light brown. Work fast - you don’t want to burn these ingredients.
4. Put in the green beans, salt and sugar. Stir to mix. Turn the heat to medium-low. Add 2 Tbsp. water. Toss in the ground cumin (and the coconut if you are adding this ingredient) and stir. Cover and cook the beans for 7 to 8 minutes or until they have absorbed the flavor of the spices. Add the black pepper to taste, mix and serve.
Inspired by Madhur Jaffrey (but then, she always inspires us)
Sunday, November 13, 2005
Turkey sausage recipe
Coastalcutie sent her recipe for turkey sausage:
This recipe is for sausage that is easy to make, and has much less fat than regular sausage, and no preservatives! Spices can be adjusted to taste.
1.25 pounds ground turkey
1 small onion, minced
1 Tbls. chopped fresh parsley
3 lg cloves garlic, minced
1 tsp. salt
1 tsp. fennel seed
2 tsp. McCormic/Schilling turkey rub (sold in jars)
1/4 tsp. pepper
Mix all ingredients together well, and for best results, let refrigerate overnight for the best flavor. Use like breakfast sausage, or in place of Italian sausage in recipes. It also makes great meatballs.
This recipe is for sausage that is easy to make, and has much less fat than regular sausage, and no preservatives! Spices can be adjusted to taste.
1.25 pounds ground turkey
1 small onion, minced
1 Tbls. chopped fresh parsley
3 lg cloves garlic, minced
1 tsp. salt
1 tsp. fennel seed
2 tsp. McCormic/Schilling turkey rub (sold in jars)
1/4 tsp. pepper
Mix all ingredients together well, and for best results, let refrigerate overnight for the best flavor. Use like breakfast sausage, or in place of Italian sausage in recipes. It also makes great meatballs.
Thursday, November 10, 2005
Tomato Marinade
Sent by Fearless:
In season, not a lot of garlic, but none better.
Uses: by itself {healthy} or in addition to most recipes, like hamburgerss needing something new.
3 tomatoes sliced however you like them.
Add marinade:
1/3 c. salad oil
1/8 c. wine vinegar
1/8 c. parsley or cilantro
1/8 c. diced onion
2 garlic cloves, diced or minced
1/2 tsp each of salt, dill weed, and basil
1/8 tsp pepper
refrigerate 2 hours, ENJOY
In season, not a lot of garlic, but none better.
Uses: by itself {healthy} or in addition to most recipes, like hamburgerss needing something new.
3 tomatoes sliced however you like them.
Add marinade:
1/3 c. salad oil
1/8 c. wine vinegar
1/8 c. parsley or cilantro
1/8 c. diced onion
2 garlic cloves, diced or minced
1/2 tsp each of salt, dill weed, and basil
1/8 tsp pepper
refrigerate 2 hours, ENJOY
Monday, November 7, 2005
Garlic Health Benefits
JadeMarie found the link for Garlic for Health:
Garlic health benefits and medicinal properties have long been known. Garlic has long been considered a herbal "wonder drug", with a reputation for preventing everything from the common cold and flu to the Plague! It has been used extensively in herbal medicine (phytotherapy, sometimes spelt phitotherapy). Raw garlic is used by some to treat the symptoms of acne and there is some evidence that it can assist in managing high cholesterol levels. It can even be effective as a natural mosquito repellent...... [LINK]
Garlic health benefits and medicinal properties have long been known. Garlic has long been considered a herbal "wonder drug", with a reputation for preventing everything from the common cold and flu to the Plague! It has been used extensively in herbal medicine (phytotherapy, sometimes spelt phitotherapy). Raw garlic is used by some to treat the symptoms of acne and there is some evidence that it can assist in managing high cholesterol levels. It can even be effective as a natural mosquito repellent...... [LINK]
Tuesday, November 1, 2005
Olive roasted head of garlic
The Cooking Diva sent an email to the link for her olive roasted head of garlic. You can find it here (and it has a nice picture on it).
Here is a copy of the recipe and of her post:
Garlic joy..., that is what I feel right now! Oh my garlic..., Oh my delicious roasted garlic... There is nothing better than a fresh roasted head of garlic to have with a still warm loaf of French bread. And I say loaf, because when you start would be very difficult to stop! :)
Now, I am going to present you a list of reasons why this recipe is a MUST for your life:
1. It is so easy to prepare, always a good thing to have in the fridge ready. A delicacy like this is very expensive to purchase already prepared..., just take a look at the gourmet shop near you, or at the supermarket..., and you will see what I mean.
2. The health benefits of the garlic are widely known, including the fact that is considered a mosquito repellent (that in my case would be of great help, because they LOVE me!). It is believed that if you eat a large amount of garlic then it actually seeps out through the pores of your skin. Any intelligent mosquito which finds you will think twice before taking a bite. You can read more on the health benefits of eating garlic HERE.
3. There are so many scrumptious recipes you could prepare with roasted garlic, why do not you try now?
The Ingredients:
4 heads of garlic
2 tablespoon olive oil
1/2 teaspoon salt
1/4 teaspoon black pepper
1/4 cup water
Directions:
1. Pre-heat the oven to 500 F. Trim the stems of the garlic heads by 1/2-inch.
2. Place the garlic heads, cut side up, in a small baking dish and drizzle them with olive oil and season with salt and pepper. Then add the water to the baking dish and bake in the preheated oven for 30 minutes, or until the garlic is golden brown on top.
3. Remove the baking dish from the oven and let the garlic cool completely. Then, squeeze carefully the garlic out from the skins.
4. Serve with slices of French bread and garnish garlic with little olive oil and parsley on top.
Enjoy! Melissa
Here is a copy of the recipe and of her post:
Garlic joy..., that is what I feel right now! Oh my garlic..., Oh my delicious roasted garlic... There is nothing better than a fresh roasted head of garlic to have with a still warm loaf of French bread. And I say loaf, because when you start would be very difficult to stop! :)
Now, I am going to present you a list of reasons why this recipe is a MUST for your life:
1. It is so easy to prepare, always a good thing to have in the fridge ready. A delicacy like this is very expensive to purchase already prepared..., just take a look at the gourmet shop near you, or at the supermarket..., and you will see what I mean.
2. The health benefits of the garlic are widely known, including the fact that is considered a mosquito repellent (that in my case would be of great help, because they LOVE me!). It is believed that if you eat a large amount of garlic then it actually seeps out through the pores of your skin. Any intelligent mosquito which finds you will think twice before taking a bite. You can read more on the health benefits of eating garlic HERE.
3. There are so many scrumptious recipes you could prepare with roasted garlic, why do not you try now?
The Ingredients:
4 heads of garlic
2 tablespoon olive oil
1/2 teaspoon salt
1/4 teaspoon black pepper
1/4 cup water
Directions:
1. Pre-heat the oven to 500 F. Trim the stems of the garlic heads by 1/2-inch.
2. Place the garlic heads, cut side up, in a small baking dish and drizzle them with olive oil and season with salt and pepper. Then add the water to the baking dish and bake in the preheated oven for 30 minutes, or until the garlic is golden brown on top.
3. Remove the baking dish from the oven and let the garlic cool completely. Then, squeeze carefully the garlic out from the skins.
4. Serve with slices of French bread and garnish garlic with little olive oil and parsley on top.
Enjoy! Melissa
Thursday, October 27, 2005
Butternut Tostada
I found this recipe at The Adventures of Crazy Biker Chick, it doesn't have a lot of garlic, but it sounds delicious.
1 butternut squash (to make 2 cups cooked pulp)
4 tortillas
1 tbsp oil
1 tsp chili powder
1/2 tsp ground cumin
1 clove garlic minced
1 tsp well-rubbed oregano
1 cup shredded cheddar or jack cheese
4 cups shredded lettuce or alfalfa sprouts (ed: definitely use yummy sprouts!)
salsa (see below)
optional - toasted pumpkin seeds
Cut and quarter the butteernut and steam for 20 min. Meanwhile, toast the tortillas over gas burner or on a griddle under just softly crisp.
Remove the squash pulp form the skins. Heat oil in a heavy pan and sprinkle with chili powder, cumin and garlic. Stir and fry until the spices are fragrant. Add squash and oregano, stirring while mixture heats through.
Place squash on tortillas, sprinkle with shredded cheese, and place under broiler until cheese melts. Remove, cover with lettuce or sprouts, and dot with salsa. A handful of toasted pumpkin seeds makes a delicious final touch.
Salsa
3 ripe, red tomatoes
4 green onions
2 cloves garlic
1 jalapeno or yellow hot chili pepper
1/4 cup chopped fresh coriander leaves
1 tsp oregano
Dice tomatoes, chop onions, mince garlic and chili; combine all these with herbs and mix well.
1 butternut squash (to make 2 cups cooked pulp)
4 tortillas
1 tbsp oil
1 tsp chili powder
1/2 tsp ground cumin
1 clove garlic minced
1 tsp well-rubbed oregano
1 cup shredded cheddar or jack cheese
4 cups shredded lettuce or alfalfa sprouts (ed: definitely use yummy sprouts!)
salsa (see below)
optional - toasted pumpkin seeds
Cut and quarter the butteernut and steam for 20 min. Meanwhile, toast the tortillas over gas burner or on a griddle under just softly crisp.
Remove the squash pulp form the skins. Heat oil in a heavy pan and sprinkle with chili powder, cumin and garlic. Stir and fry until the spices are fragrant. Add squash and oregano, stirring while mixture heats through.
Place squash on tortillas, sprinkle with shredded cheese, and place under broiler until cheese melts. Remove, cover with lettuce or sprouts, and dot with salsa. A handful of toasted pumpkin seeds makes a delicious final touch.
Salsa
3 ripe, red tomatoes
4 green onions
2 cloves garlic
1 jalapeno or yellow hot chili pepper
1/4 cup chopped fresh coriander leaves
1 tsp oregano
Dice tomatoes, chop onions, mince garlic and chili; combine all these with herbs and mix well.
Sunday, October 23, 2005
Garlic olive oil
I got an email yesterday, from Gina
Well, this is how I would do it, I learned this trick from my father a long time ago:
Chop garlic cloves really really fine. Put them in a bottle. Also put in th bottle some hot pepper flakes like the ones people usually put on pizza.
Fill the bottle with extra virgin olive oil and close tightly.There's no need to refrigerate, since it's oil. In about 2 weeks, you can use your homemade chili-garlic oil. To avoid the risk of botulism, use it right away or keep it in the fridge for up to one week.
http://www.hc-sc.gc.ca/iyh-vsv/food-aliment/garlic-ail_e.html
Any other suggestions from Garlicster readers?
Hello! Wondered if you could help me with a recipe.
An olive bar near me recently stopped carrying garlic cloves in oil with red
pepper flakes. They were so delicious and I’m sure there was no vinegar. Can you
help!? Thanks! Gina
Well, this is how I would do it, I learned this trick from my father a long time ago:
Chop garlic cloves really really fine. Put them in a bottle. Also put in th bottle some hot pepper flakes like the ones people usually put on pizza.
Fill the bottle with extra virgin olive oil and close tightly.
http://www.hc-sc.gc.ca/iyh-vsv/food-aliment/garlic-ail_e.html
Any other suggestions from Garlicster readers?
Monday, October 17, 2005
Garlic and Clam Cream Sauce Pasta
Recipe taken from Rhosgobel: Radagast's home
My SO and I found this recipe in an issue of Fine Cooking a few years ago, and since then it's been one of our most frequently-made recipes. The sauce is not as thick as your typical cream sauce (e.g., fettuccine alfredo), and is also quite flavorful thanks to the combination of clams, garlic, herbs, and cheese.
This recipe is quick and easy; my SO and I can make this dish in less than 25 minutes. The slowest step is cooking the pasta, and even that can be done in parallel with making the sauce. Since I made this last week after a long day at work, it's this week's end-of-the-week recipe blogging post.
1 1/2 tablespoons butter
2 6.5oz cans chopped clams (drained, reserve the liquid for the juice below)
3 large cloves garlic, finely chopped or pressed with a garlic press
1/2 teaspoon dried oregano
1/4 teaspoon red pepper flakes
2/3 cup clam juice (reserved from the cans above)
1/2 to 2/3 cup heavy cream
1/4 cup chopped fresh parsley
1/4 cup grated Parmesan or Pecorino Romano cheese
1/2 pound dry pasta (we often use fusili)
0. Cook the pasta in salted water until it is al dente. When cooked, drain the pasta, but do not rinse with water. Work on the sauce (steps 1-6) while the pasta is cooking, though try to schedule your cooking so the pasta is done somewhat before it needs to be added to the sauce (in step 8).
1. In a large frying pan melt the butter over medium-high heat.
2. Add the clams and fry for 1-2 minutes, stirring frequently.
3. Add the garlic and fry for a minute longer, stirring frequently.
4. Add the oregano and red pepper flakes, stir for a few seconds, and then add the clam juice.
5. Cook until the clam juice is reduced in volume by approximately 50% (a few minutes).
6. Add the cream, and cook (simmering) until the sauce is a good consistency to coat the pasta (a moderately-thick sauce), stirring occasionally. It usually takes 2-4 minutes for the sauce to thicken to the right consistency; check the thickness of the sauce by stirring regularly with a spoon. When ready, the sauce should be a good deal thicker than it was just after you added the cream.
7. Once the sauce is thickened, mix in the parsley and cheese.
8. Add the drained pasta, mix well, and serve with grated cheese.
This recipe makes enough for a hearty dinner for the two of us, with very little left over. The original article says that the pasta doesn't reheat well; I've found that it reheats just fine in the microwave, as long as I mix it frequently as I reheat it, and add a little bit of freshly grated cheese once it's hot.
The flavor of the sauce is much more intense if you use fresh parsley, so don't use dried parsley unless you absolutely have to. Parsley is pretty easy to grow; I have a parsley plant in my backyard that I use primarily to make this dish.
The original article encourages flexibility with the sauce's ingredients, and includes five other recipes for similarly flavorful cream sauces.
Weinstein, B., and M. Scarbrough. 2002. "How to Make a Light Creamy Pasta Sauce." Fine Cooking 50: 45-49.
My SO and I found this recipe in an issue of Fine Cooking a few years ago, and since then it's been one of our most frequently-made recipes. The sauce is not as thick as your typical cream sauce (e.g., fettuccine alfredo), and is also quite flavorful thanks to the combination of clams, garlic, herbs, and cheese.
This recipe is quick and easy; my SO and I can make this dish in less than 25 minutes. The slowest step is cooking the pasta, and even that can be done in parallel with making the sauce. Since I made this last week after a long day at work, it's this week's end-of-the-week recipe blogging post.
1 1/2 tablespoons butter
2 6.5oz cans chopped clams (drained, reserve the liquid for the juice below)
3 large cloves garlic, finely chopped or pressed with a garlic press
1/2 teaspoon dried oregano
1/4 teaspoon red pepper flakes
2/3 cup clam juice (reserved from the cans above)
1/2 to 2/3 cup heavy cream
1/4 cup chopped fresh parsley
1/4 cup grated Parmesan or Pecorino Romano cheese
1/2 pound dry pasta (we often use fusili)
0. Cook the pasta in salted water until it is al dente. When cooked, drain the pasta, but do not rinse with water. Work on the sauce (steps 1-6) while the pasta is cooking, though try to schedule your cooking so the pasta is done somewhat before it needs to be added to the sauce (in step 8).
1. In a large frying pan melt the butter over medium-high heat.
2. Add the clams and fry for 1-2 minutes, stirring frequently.
3. Add the garlic and fry for a minute longer, stirring frequently.
4. Add the oregano and red pepper flakes, stir for a few seconds, and then add the clam juice.
5. Cook until the clam juice is reduced in volume by approximately 50% (a few minutes).
6. Add the cream, and cook (simmering) until the sauce is a good consistency to coat the pasta (a moderately-thick sauce), stirring occasionally. It usually takes 2-4 minutes for the sauce to thicken to the right consistency; check the thickness of the sauce by stirring regularly with a spoon. When ready, the sauce should be a good deal thicker than it was just after you added the cream.
7. Once the sauce is thickened, mix in the parsley and cheese.
8. Add the drained pasta, mix well, and serve with grated cheese.
This recipe makes enough for a hearty dinner for the two of us, with very little left over. The original article says that the pasta doesn't reheat well; I've found that it reheats just fine in the microwave, as long as I mix it frequently as I reheat it, and add a little bit of freshly grated cheese once it's hot.
The flavor of the sauce is much more intense if you use fresh parsley, so don't use dried parsley unless you absolutely have to. Parsley is pretty easy to grow; I have a parsley plant in my backyard that I use primarily to make this dish.
The original article encourages flexibility with the sauce's ingredients, and includes five other recipes for similarly flavorful cream sauces.
Weinstein, B., and M. Scarbrough. 2002. "How to Make a Light Creamy Pasta Sauce." Fine Cooking 50: 45-49.
Tuesday, October 11, 2005
Diablo Sauce
Mr. Anchovy posted a recipe for diablo sauce that could potentially have lots of garlic. Here it is, or follow this link:
Run all your chiles through a food processor.
Toss the chopped up chiles into a big pot with plenty of cider or wine vinegar.
Optional: add in chopped up onions and garlic (this time, I added about 30 cloves of garlic....last time I didn't add any....up to you)
Let it all simmer away for an hour or so.
Add in some white sugar (I use about 2 cups for a good sized pot full of sauce)
Simmer it for another twenty minutes.
Jar it up using standard canning procedures. I always put the filled and sealed jars back into boiling water for about 15 minutes.
Feel the love.
Run all your chiles through a food processor.
Toss the chopped up chiles into a big pot with plenty of cider or wine vinegar.
Optional: add in chopped up onions and garlic (this time, I added about 30 cloves of garlic....last time I didn't add any....up to you)
Let it all simmer away for an hour or so.
Add in some white sugar (I use about 2 cups for a good sized pot full of sauce)
Simmer it for another twenty minutes.
Jar it up using standard canning procedures. I always put the filled and sealed jars back into boiling water for about 15 minutes.
Feel the love.
Friday, September 30, 2005
Spinach Pasta with Shrimp, Garlic, Feta & Tomatoes
Recipe sent by: Christine
Very easy to make. Roast tomatoes with some garlic, kosher salt and olive oil in a very hot oven (425 or so). After ten minutes, add shrimp, chopped parsley, and a little lemon juice. Sprinkle with a cup of feta and cook 10 more minutes. I like to serve it over a dark pasta for contrast.

Very easy to make. Roast tomatoes with some garlic, kosher salt and olive oil in a very hot oven (425 or so). After ten minutes, add shrimp, chopped parsley, and a little lemon juice. Sprinkle with a cup of feta and cook 10 more minutes. I like to serve it over a dark pasta for contrast.
Thursday, September 29, 2005
Baked tomato with garlic au-gratin
All you need is:
Tomatoes (not plum tomatoes, plum tomatoes are evil, you want round tomatoes, preferably Ontario tomatoes)
Garlic salt
Slivers of garlic (as many as you want, depending on how many tomatoes you are making)
Italian seasoning (including oregano)
Olive oil
Parmesan cheese
Instructions:
Cut the tomatoes in half, pour a bit of olive oil on each one. Season with garlic salt and place the slivers of garlic on each half. Sprinkle with Italian seasoning and with parmesan cheese.
Bake at 350 F for about 25 or 30 minutes.
It turns out delicious, I made this and really loved it. It's really healthy and garlicky!

Tomatoes (not plum tomatoes, plum tomatoes are evil, you want round tomatoes, preferably Ontario tomatoes)
Garlic salt
Slivers of garlic (as many as you want, depending on how many tomatoes you are making)
Italian seasoning (including oregano)
Olive oil
Parmesan cheese
Instructions:
Cut the tomatoes in half, pour a bit of olive oil on each one. Season with garlic salt and place the slivers of garlic on each half. Sprinkle with Italian seasoning and with parmesan cheese.
Bake at 350 F for about 25 or 30 minutes.
It turns out delicious, I made this and really loved it. It's really healthy and garlicky!
Monday, September 19, 2005
Garlic eggplant
Ingredients:
3 cloves of garlic
1 medium eggplant
Olive oil
Salt
Chop eggplant in small cubes, after chopping it, you may want to pour some salt over it and leave it resting for a while. This is a trick I learned in Italy to remove the bitterness that the eggplant may have.
Finely chop garlic cloves.
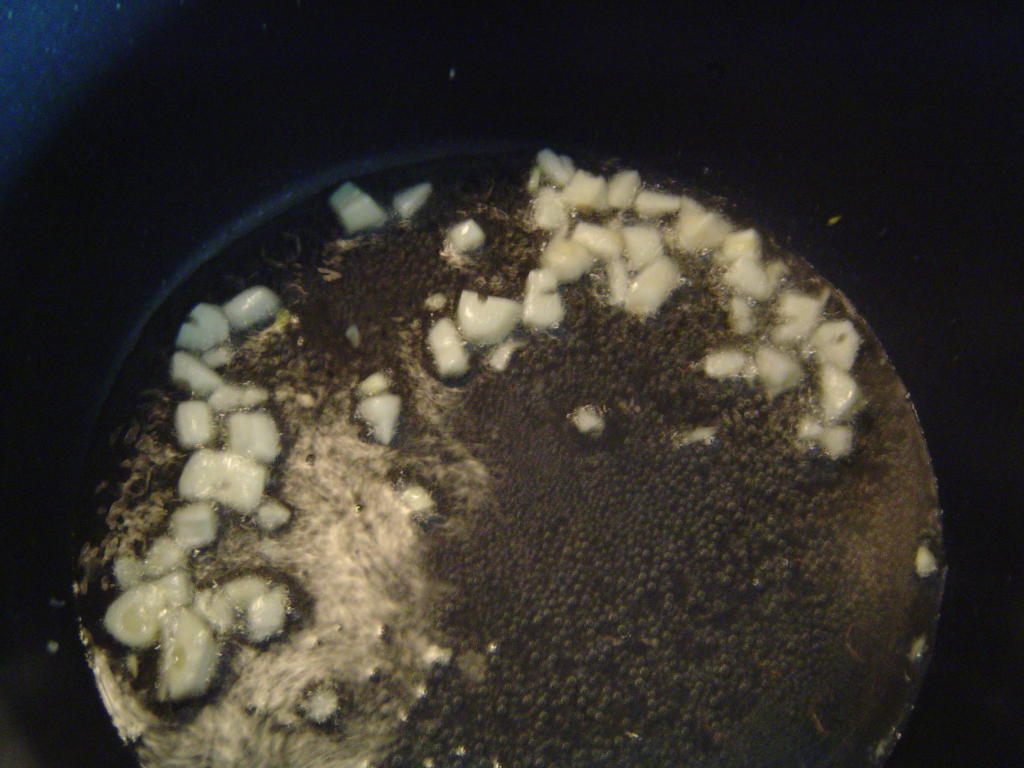
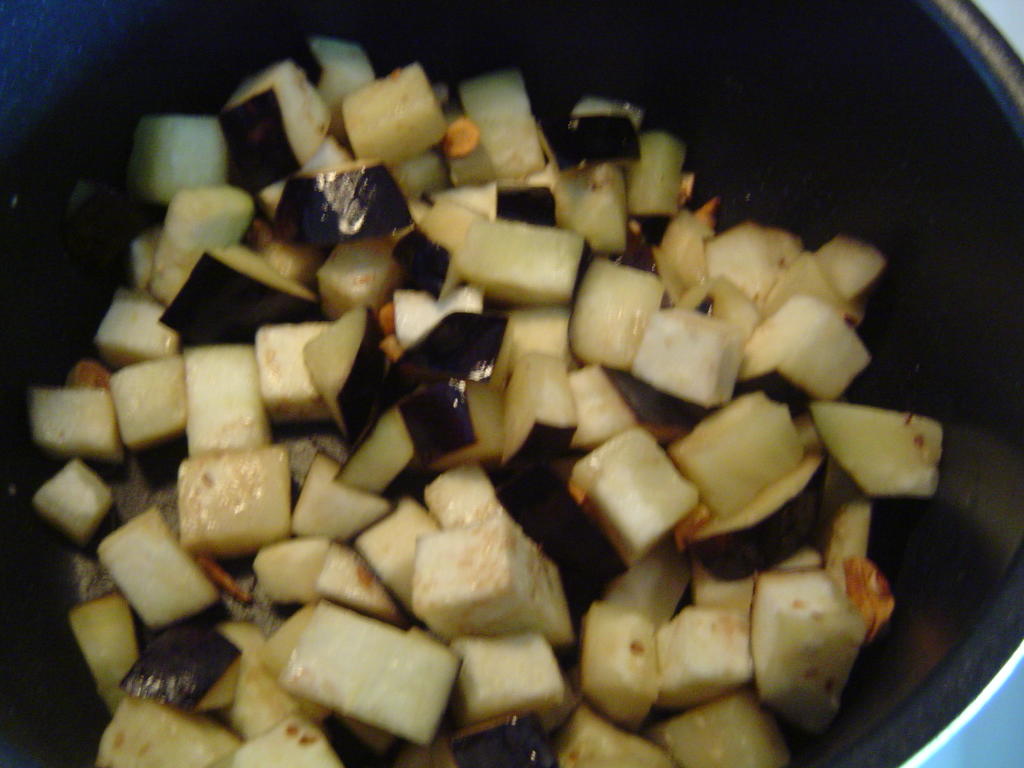
Heat olive oil and fry chopped garlic cloves until golden, being careful not to burn them. This will make the olive oil get that delicious garlicky flavour.
3 cloves of garlic
1 medium eggplant
Olive oil
Salt
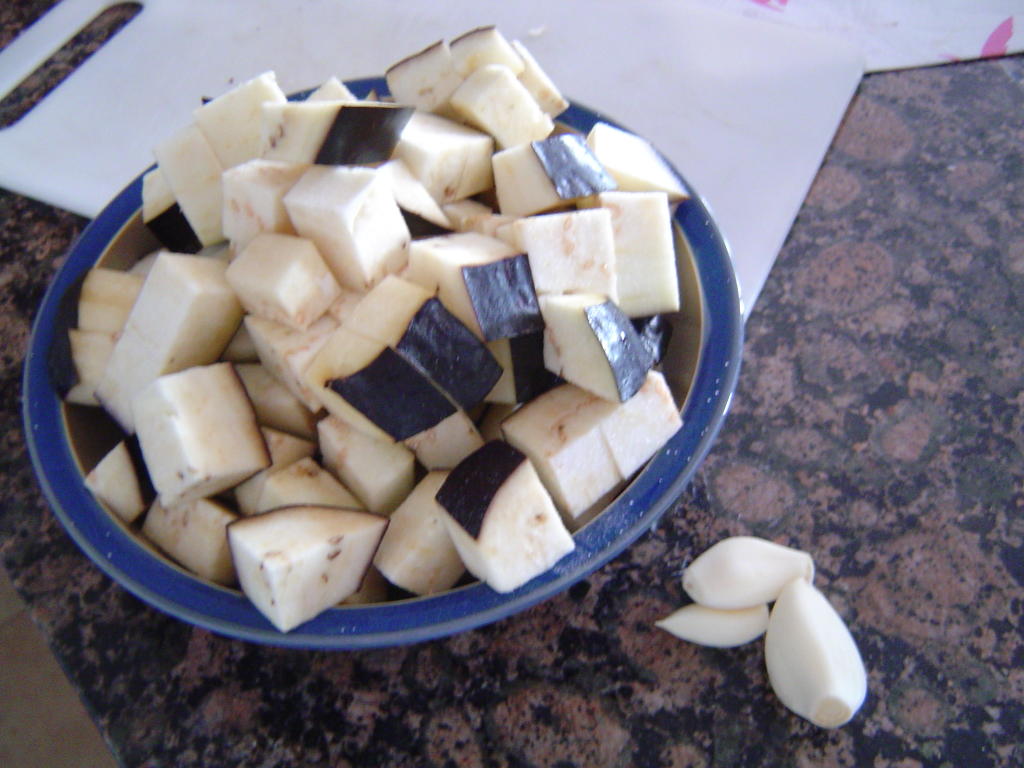
Chop eggplant in small cubes, after chopping it, you may want to pour some salt over it and leave it resting for a while. This is a trick I learned in Italy to remove the bitterness that the eggplant may have.
Finely chop garlic cloves.
Heat olive oil and fry chopped garlic cloves until golden, being careful not to burn them. This will make the olive oil get that delicious garlicky flavour.

Monday, September 12, 2005
Onion Surprise
I know this blog is all about garlic, but Frank sent this recipe and it seems so super delicious that I'm posting it. (sorry about the lack of posting, my computer at home is still broken, it'll take another TWO WEEKS to be ready)
Onion Surprise
Submitted by: Frank
Ingredients:
1 lg Spanish onion
2 Tbls butter
1 bullion cube flavor of choice
2 cloves of crushed garlic
Dash of salt or Spike
1 Surprise (explained later)
Directions:
Peal onion. Core onion from sprout end about 3/4 deep.
Insert all ingredients. Now, for the Surprise. Take a spice of your choice and add 1/4 to 1/2 tsp to core of onion. My favorite is red pepper flakes or orange zest. Experiment, this is a lot of fun. After all ingredients have been place in onion, replace part of the core (not the sprout), wrap tightly in aluminum foil and bake at 350' for about 35 min. Place in a bowl and remove foil. The aroma and flavor of this
treat should be unforgettable. Serve with french bread or you can even make a fondue of it.
The size of the onion will determine serving size or adjust to smaller size onion for soup entree.
I'd love your feed back on this.
Onion Surprise
Submitted by: Frank
Ingredients:
1 lg Spanish onion
2 Tbls butter
1 bullion cube flavor of choice
2 cloves of crushed garlic
Dash of salt or Spike
1 Surprise (explained later)
Directions:
Peal onion. Core onion from sprout end about 3/4 deep.
Insert all ingredients. Now, for the Surprise. Take a spice of your choice and add 1/4 to 1/2 tsp to core of onion. My favorite is red pepper flakes or orange zest. Experiment, this is a lot of fun. After all ingredients have been place in onion, replace part of the core (not the sprout), wrap tightly in aluminum foil and bake at 350' for about 35 min. Place in a bowl and remove foil. The aroma and flavor of this
treat should be unforgettable. Serve with french bread or you can even make a fondue of it.
The size of the onion will determine serving size or adjust to smaller size onion for soup entree.
I'd love your feed back on this.
Tuesday, September 6, 2005
The real gazpacho
Gazpacho is not just ANY cold soup! Gazpacho does not have avocado, gazpacho does not have mint in it. Gazpacho is a cold cucumber, tomato and green pepper soup. Gazpacho has lots and lots of garlic!
You can make authentic gazpacho with Ontario grown ingredients:
1 large seedless cucumber
3 medium tomatoes
1 medium green pepper
1/2 red onion
4 cloves of garlic
1 panini bread
Really concentrated Knorr vegetable broth
Oil and vinegar to taste
Salt and pepper to taste
Peel the cucumber and the garlic cloves, chop all ingredients and put them all in the blender:
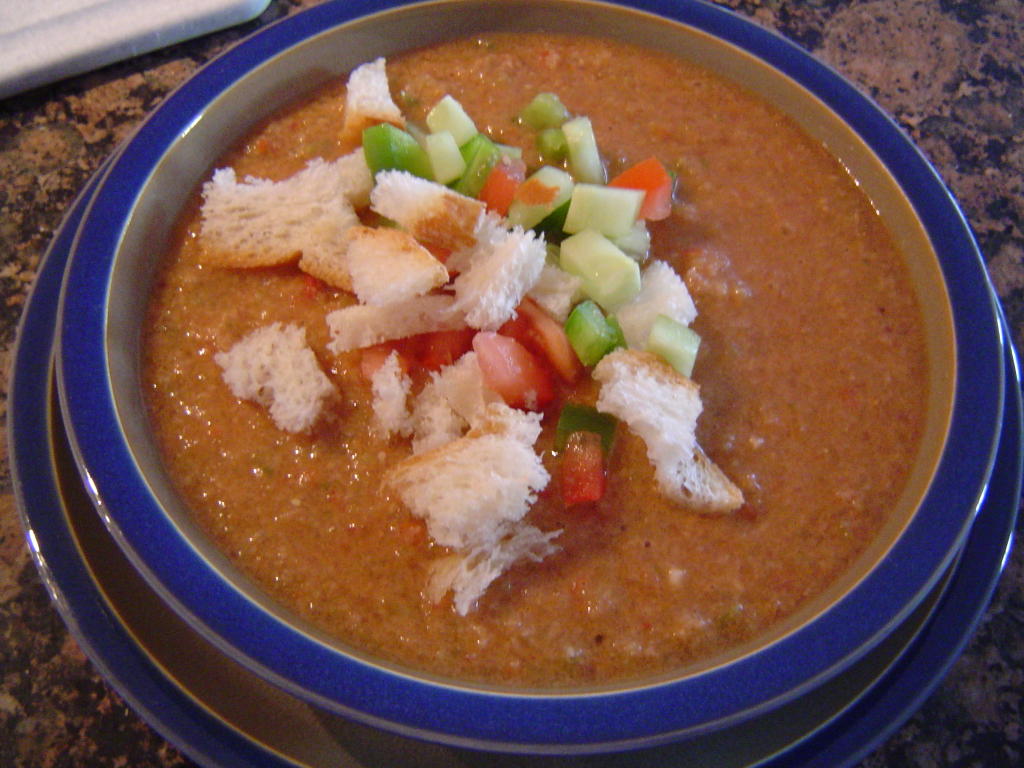
Serve in a bowl (again, gazpacho is not like a V8 juice, it is eaten like a soup, not drunk like a juice!). Garnish it with tiny chopped pieces of bread, cucumber, tomato and green pepper.
You can make authentic gazpacho with Ontario grown ingredients:

1 large seedless cucumber
3 medium tomatoes
1 medium green pepper
1/2 red onion
4 cloves of garlic
1 panini bread
Really concentrated Knorr vegetable broth
Oil and vinegar to taste
Salt and pepper to taste
Peel the cucumber and the garlic cloves, chop all ingredients and put them all in the blender:

Serve in a bowl (again, gazpacho is not like a V8 juice, it is eaten like a soup, not drunk like a juice!). Garnish it with tiny chopped pieces of bread, cucumber, tomato and green pepper.
Tuesday, August 30, 2005
Garlic Expressions
Some months ago, a fellow garlic lover from Ohio asked if anyone had tried the Garlic Expressions salad dressing .
I got this email from Ken Smith:
"Yes, I have tried garlic expressions salad dressing and it is absolutely my favorite. I buy it by the case and give it away to friends. My only complaint is I can't buy it retail anywhere in the Spokane, WA area. I used to be able to get it at our local Safeway and Fred Myers but not any more. The only way for me to buy it is through email order. I use it for everything from salads to fish, chicken and vegetables. I have tried emailing the company to find retail outlets here but no luck. Any ideas?"
I guess what you could do is order by mail and have itshipped to Washington. That's what we do in Canada sometimes with articles from the States that are not available here. Any other ideas?
I got this email from Ken Smith:
"Yes, I have tried garlic expressions salad dressing and it is absolutely my favorite. I buy it by the case and give it away to friends. My only complaint is I can't buy it retail anywhere in the Spokane, WA area. I used to be able to get it at our local Safeway and Fred Myers but not any more. The only way for me to buy it is through email order. I use it for everything from salads to fish, chicken and vegetables. I have tried emailing the company to find retail outlets here but no luck. Any ideas?"
I guess what you could do is order by mail and have itshipped to Washington. That's what we do in Canada sometimes with articles from the States that are not available here. Any other ideas?
Monday, August 29, 2005
Caesar salad dressing
Recipe sent by Cathrine Qua
You need a bottle the size of the ones Classico Pasta Sauce is in (700ml)
Crush anywhere from 1 bud to 2 buds garlic (go big or go home!) and put it in the bottle
Fill the jar 1/3 full with olive oil
Add lemon juice until the jar is 2/3 full
Add parmesan cheese until there is a little bit of room left
(The recipe is equal parts of oil, lemon juice, and parmesan)
Add scant 1/4 cup Lea & Perrins worchestishire sauce
Add 1 tsp salt
Add fresh grated pepper - a scant tsp
Shake the heck out of the jar, and then taste. Adjust seasonings. We never measure when we make this, we just adjust it until it tastes right.
Enjoy! (It gets stinkier the longer it's in the fridge!)
Sounds delicious!
You need a bottle the size of the ones Classico Pasta Sauce is in (700ml)
Crush anywhere from 1 bud to 2 buds garlic (go big or go home!) and put it in the bottle
Fill the jar 1/3 full with olive oil
Add lemon juice until the jar is 2/3 full
Add parmesan cheese until there is a little bit of room left
(The recipe is equal parts of oil, lemon juice, and parmesan)
Add scant 1/4 cup Lea & Perrins worchestishire sauce
Add 1 tsp salt
Add fresh grated pepper - a scant tsp
Shake the heck out of the jar, and then taste. Adjust seasonings. We never measure when we make this, we just adjust it until it tastes right.
Enjoy! (It gets stinkier the longer it's in the fridge!)
Sounds delicious!
Wednesday, August 24, 2005
Papardelle with garlic and bacon sauce
I took this picture at Terroni, on Victoria St. in Toronto. Amazing Italian restaurant, I felt like I was in Florence or something. And delicious food. (You can eve see the garlic cloves right there!)
(Sorry about the crappy post... and picture. My computer is still broken at home, it will be about 2 more weeks till I get the part and have it fixed. Meanwhile I don't have photoshop here to fix the pic. But doesn't it look delicious? It was!)

(Sorry about the crappy post... and picture. My computer is still broken at home, it will be about 2 more weeks till I get the part and have it fixed. Meanwhile I don't have photoshop here to fix the pic. But doesn't it look delicious? It was!)
Thursday, August 18, 2005
Broken computer
My computer at home is broken. I won't be able to post any recipes for a couple of days. But I have a surprise for the end of the summer: the recipe for GAZPACHO!! (with pictures). Lots and lots of garlic, delicious! I'll post it soon.
Monday, August 15, 2005
Voodoo Bruschetta
Remember that "Bruschetta" is pronounced broos-KAY-tah (and not (broo-SHAY-ta).
Recipe sent by Cathrine
Ingredients:
3/4 to 1 lb pizza dough (or a baquette, sliced and toasted)
6-8 ripe plum tomatoes
2 tablespoon finely chopped red onion (optional)
2 cloves to 2 buds crushed garlic
1/4 cup chopped fresh basil or several tablespoon of pesto
2 teaspoon red wine vinegar or lemon juice
1-4 tablespoon olive oil
1-2 teaspoon or tablespoon chilli paste (found in Asian section of supermarket)
salt & pepper to taste
10-20 pitted kalmatta olives, chopped
Parmesan, grated
Directions:
Cut tomatoes in half and squeeze out the seeds. Chop tomatoes into small dice; place in bowl. Add onion, garlic, basil or pesto, vinegar or lemon juice, chili paste, olives, salt & pepper to taste. Let stand for about an hour. Drain liquid if desired. Roll out pizza dough into a thin rounded rectangle. Bake pizza dough at 400 degrees for 20 minutes, until lightly browned. Spread with tomato mixture. Top with the Parmesan. Enjoy. (As for the garlic, go big or go home!!)
Serves: 4
Preparation time: 30 mins
Recipe sent by Cathrine
Ingredients:
3/4 to 1 lb pizza dough (or a baquette, sliced and toasted)
6-8 ripe plum tomatoes
2 tablespoon finely chopped red onion (optional)
2 cloves to 2 buds crushed garlic
1/4 cup chopped fresh basil or several tablespoon of pesto
2 teaspoon red wine vinegar or lemon juice
1-4 tablespoon olive oil
1-2 teaspoon or tablespoon chilli paste (found in Asian section of supermarket)
salt & pepper to taste
10-20 pitted kalmatta olives, chopped
Parmesan, grated
Directions:
Cut tomatoes in half and squeeze out the seeds. Chop tomatoes into small dice; place in bowl. Add onion, garlic, basil or pesto, vinegar or lemon juice, chili paste, olives, salt & pepper to taste. Let stand for about an hour. Drain liquid if desired. Roll out pizza dough into a thin rounded rectangle. Bake pizza dough at 400 degrees for 20 minutes, until lightly browned. Spread with tomato mixture. Top with the Parmesan. Enjoy. (As for the garlic, go big or go home!!)
Serves: 4
Preparation time: 30 mins
Monday, August 8, 2005
Simmered White Beans
(an Original recipe by Lorence Sing - http://lorenceskitchen.blogspot.com/)
Ingredients:
1 can Cannellini beans, drained and rinsed
1/2 teaspoon dried Oregano or 1 teaspoon fresh Minced Oregano
2 or 3 cloves of Garlic, minced
1/2 cup of Chicken Broth
1 Tablespoons of Olive Oil
Directions:
1) Put all ingredients into a medium saucepan and simmer, uncovered, for 5 to 10minutes
2) Cover and simmer for about 15 minutes more.
3) Serve immediately. If serving with the Garli-Lemon buttered Shrimp recipe above, drizzle a bit of the Shrimp's sauce over the beans, too.
Enjoy!
Ingredients:
1 can Cannellini beans, drained and rinsed
1/2 teaspoon dried Oregano or 1 teaspoon fresh Minced Oregano
2 or 3 cloves of Garlic, minced
1/2 cup of Chicken Broth
1 Tablespoons of Olive Oil
Directions:
1) Put all ingredients into a medium saucepan and simmer, uncovered, for 5 to 10minutes
2) Cover and simmer for about 15 minutes more.
3) Serve immediately. If serving with the Garli-Lemon buttered Shrimp recipe above, drizzle a bit of the Shrimp's sauce over the beans, too.
Enjoy!
Friday, August 5, 2005
Pan Seared Shrimp with Garlic-Lemon butter
Recipe sent by Lorence:
Pan-Seared Shrimp (from Cooks Illistrated)
The cooking times below are for 21/25 shrimp (that is, the size of the shrimp is such that there are 21 to 25 in 1 pound). If 21/25 shrimp are not available, adjust cooking times slightly. Either a nonstick or traditional skillet will work for this recipe, but a nonstick will simplify cleanup.
Ingredients:
2 tablespoons vegetable oil
1 1/2 pounds 21/25 shrimp, peeled and deveined
1/4 teaspoon salt
1/4 teaspoon ground black pepper
1/8 teaspoon sugar
Directions:
1) Heat 1 tablespoon oil in 12-inch skillet over high heat until smoking.
2) Meanwhile, toss shrimp, salt, pepper, and sugar in medium bowl.
3) Add half of shrimp to pan in single layer and cook until spotty brown and edges turn pink, about 1 minute.
4) Remove pan from heat; using tongs, flip each shrimp and let stand until all but very center is opaque, about 30 seconds.
5) Transfer shrimp to large plate.
6) Repeat with remaining tablespoon oil and shrimp;
7) After second batch has stood off heat, return first batch to skillet and toss to combine.
8) Cover skillet and let stand until shrimp are cooked through, 1 to 2 minutes.
9) Serve immediately.
Pan-Seared Shrimp with Garlic-Lemon Butter
1) Beat 3 tablespoons softened unsalted butter with fork in small bowl until light and fluffy.
2) Stir in 1 medium garlic clove, minced, 1 tablespoon lemon juice, 2 tablespoons chopped parsley, and 1/8 teaspoon salt until combined.
3) Follow recipe for Pan-Seared Shrimp, adding flavored butter when returning first batch of shrimp to skillet.
4) Serve immediately, with lemon wedges, if desired.
Pan-Seared Shrimp (from Cooks Illistrated)
The cooking times below are for 21/25 shrimp (that is, the size of the shrimp is such that there are 21 to 25 in 1 pound). If 21/25 shrimp are not available, adjust cooking times slightly. Either a nonstick or traditional skillet will work for this recipe, but a nonstick will simplify cleanup.
Ingredients:
2 tablespoons vegetable oil
1 1/2 pounds 21/25 shrimp, peeled and deveined
1/4 teaspoon salt
1/4 teaspoon ground black pepper
1/8 teaspoon sugar
Directions:
1) Heat 1 tablespoon oil in 12-inch skillet over high heat until smoking.
2) Meanwhile, toss shrimp, salt, pepper, and sugar in medium bowl.
3) Add half of shrimp to pan in single layer and cook until spotty brown and edges turn pink, about 1 minute.
4) Remove pan from heat; using tongs, flip each shrimp and let stand until all but very center is opaque, about 30 seconds.
5) Transfer shrimp to large plate.
6) Repeat with remaining tablespoon oil and shrimp;
7) After second batch has stood off heat, return first batch to skillet and toss to combine.
8) Cover skillet and let stand until shrimp are cooked through, 1 to 2 minutes.
9) Serve immediately.
Pan-Seared Shrimp with Garlic-Lemon Butter
1) Beat 3 tablespoons softened unsalted butter with fork in small bowl until light and fluffy.
2) Stir in 1 medium garlic clove, minced, 1 tablespoon lemon juice, 2 tablespoons chopped parsley, and 1/8 teaspoon salt until combined.
3) Follow recipe for Pan-Seared Shrimp, adding flavored butter when returning first batch of shrimp to skillet.
4) Serve immediately, with lemon wedges, if desired.
Wednesday, August 3, 2005
Garlicky creamed spinach
Recipe taken from:
Rhosgobel: Radagast's home (and there are lots of recipes that can be accessed from this page also link)
Garlicky creamed spinach
I know it's hard to get excited about creamed spinach, but this creamed spinach is loaded with garlic, and has an ideal thick and creamy texture...
White sauce:
4 tablespoons butter
5 large cloves garlic, finely minced or pressed with a garlic press
4 tablespoons flour
1/4 teaspoon salt
1 cup milk, warmed
Other ingredients:
2 tablespoons butter
1 small onion, finely chopped
1/4 cup water
1 pound frozen, chopped spinach
1 teaspoon salt
1/2 cup sour cream
To make this creamed spinach you cook up a white sauce in one pot, some spinach and onions in another pot, and then combine the two at the end. Making the white sauce and cooking the spinach can easily be done in parallel, and all told this recipe takes less than half an hour to make.
To make the white sauce:
1. Melt 4 tablespoons butter in a small non-stick pot over medium-high heat.
2. Add the garlic, and cook, stirring, until the garlic begins to brown (~5 minutes, though it depends on your stove's heat and the size of the garlic bits).
3. Reduce the heat to medium, add the flour and salt, and, stirring constantly, cook until the flour begins to brown and starts to smell nutty/toasty (we don't time this process, but probably around 3 minutes).
4. Reduce the heat to medium low, and add the warmed milk to the flour mixture in two or three batches, whisking constantly until smooth. Do not add the milk all at once. The sauce will be very thick.
To cook the spinach and onions:
1. If you desire, defrost the spinach; we do this by putting the spinach in a large bowl, adding a few tablespoons of water, and then microwaving it until it's no longer icy (but still not cooked).
2. Melt two tablespoons of butter in a large non-stick pot over medium-high heat.
3. Add the onions and cook, stirring frequently, until the onions turn clear and start to brown (at least five minutes, though again it will vary).
4. Add the spinach, water, and one teaspoon of salt, and cook, covered and stirring occasionally, until the spinach is done. If you've defrosted the spinach this will be about five minutes, if you're using frozen spinach, this will take longer.
Assembling the dish:
1. Add the white sauce and sour cream to the cooked spinach, and stir to mix thoroughly.
If you don't really like garlic, I might suggest reducing the amount of garlic a bit. The recipe can be made quite successfully without garlic, but then it wouldn't be "garlicy creamed spinach," now would it?
We based this recipe on a creamed spinach recipe we found online years ago (I believe it was trying to mimic Boston Market's creamed spinach), but we have long since lost the link.
Rhosgobel: Radagast's home (and there are lots of recipes that can be accessed from this page also link)
Garlicky creamed spinach
I know it's hard to get excited about creamed spinach, but this creamed spinach is loaded with garlic, and has an ideal thick and creamy texture...
White sauce:
4 tablespoons butter
5 large cloves garlic, finely minced or pressed with a garlic press
4 tablespoons flour
1/4 teaspoon salt
1 cup milk, warmed
Other ingredients:
2 tablespoons butter
1 small onion, finely chopped
1/4 cup water
1 pound frozen, chopped spinach
1 teaspoon salt
1/2 cup sour cream
To make this creamed spinach you cook up a white sauce in one pot, some spinach and onions in another pot, and then combine the two at the end. Making the white sauce and cooking the spinach can easily be done in parallel, and all told this recipe takes less than half an hour to make.
To make the white sauce:
1. Melt 4 tablespoons butter in a small non-stick pot over medium-high heat.
2. Add the garlic, and cook, stirring, until the garlic begins to brown (~5 minutes, though it depends on your stove's heat and the size of the garlic bits).
3. Reduce the heat to medium, add the flour and salt, and, stirring constantly, cook until the flour begins to brown and starts to smell nutty/toasty (we don't time this process, but probably around 3 minutes).
4. Reduce the heat to medium low, and add the warmed milk to the flour mixture in two or three batches, whisking constantly until smooth. Do not add the milk all at once. The sauce will be very thick.
To cook the spinach and onions:
1. If you desire, defrost the spinach; we do this by putting the spinach in a large bowl, adding a few tablespoons of water, and then microwaving it until it's no longer icy (but still not cooked).
2. Melt two tablespoons of butter in a large non-stick pot over medium-high heat.
3. Add the onions and cook, stirring frequently, until the onions turn clear and start to brown (at least five minutes, though again it will vary).
4. Add the spinach, water, and one teaspoon of salt, and cook, covered and stirring occasionally, until the spinach is done. If you've defrosted the spinach this will be about five minutes, if you're using frozen spinach, this will take longer.
Assembling the dish:
1. Add the white sauce and sour cream to the cooked spinach, and stir to mix thoroughly.
If you don't really like garlic, I might suggest reducing the amount of garlic a bit. The recipe can be made quite successfully without garlic, but then it wouldn't be "garlicy creamed spinach," now would it?
We based this recipe on a creamed spinach recipe we found online years ago (I believe it was trying to mimic Boston Market's creamed spinach), but we have long since lost the link.
Subscribe to:
Posts (Atom)